I've been working on the exterior of the boat for a long time. A long time. My projects tend to be that way. A few examples:
There is still a little more work to do on the skeg, but
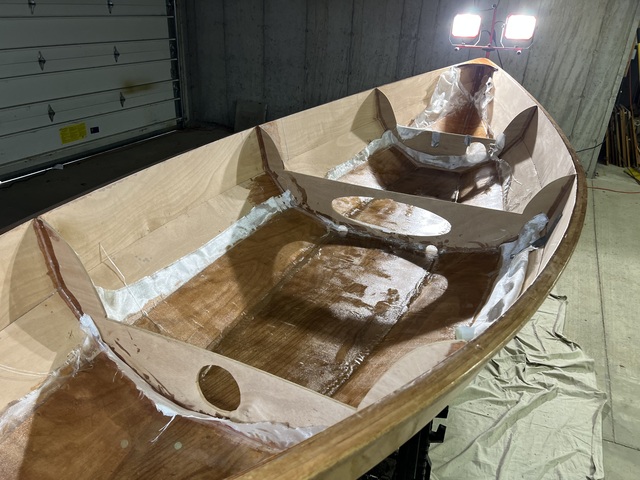
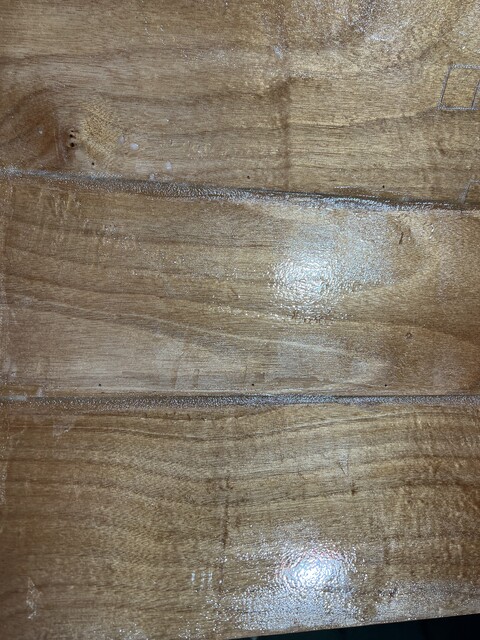
now it's time to work on the interior. What a depressing sight. Look
at this mess.
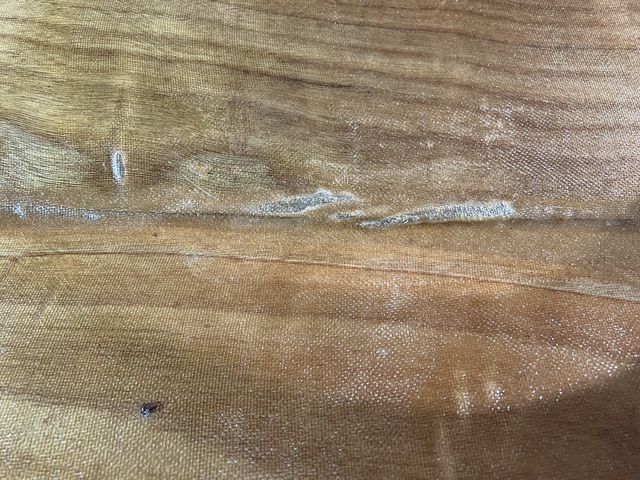
I guess there is some humidity in the basement. And having the boat upside down for months at a time probably helped trap moisture. That looks like mold to me. Also, look at how the frame (the thing with the hole in it, yes, the hole is supposed to be there), attaches to the hull. There are gaps. The epoxy is a mess.
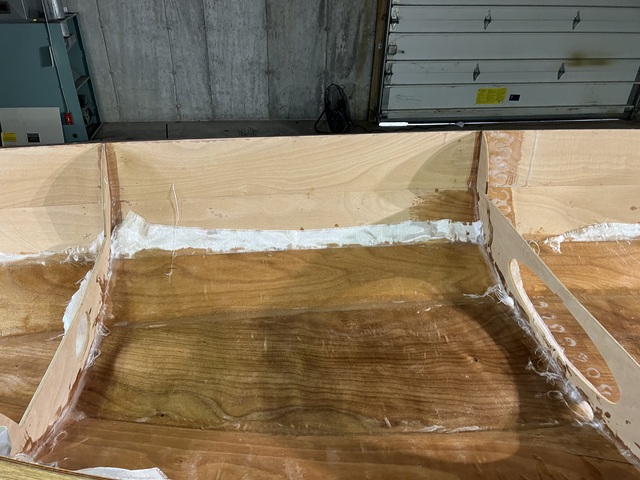
I sanded the frames, which at least made the wood look less
moldy. Further treatment might be needed though.
I also sanded various random epoxy splotches and found remaining bits of wire to remove.
I'm going to check with the forums about the mold and cleaning up the epoxy, and then start on the interior fiberglass.
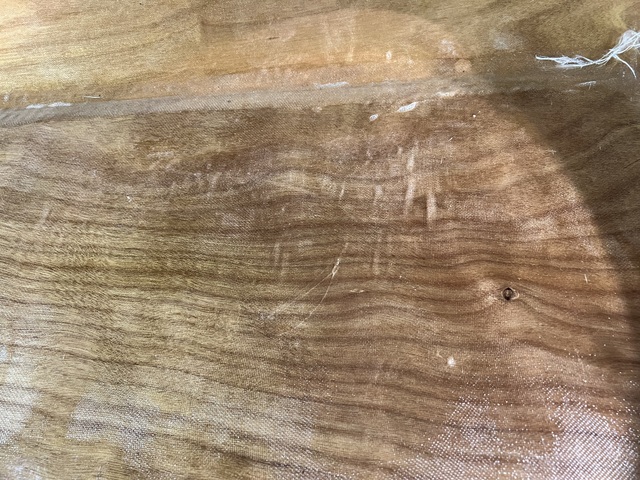
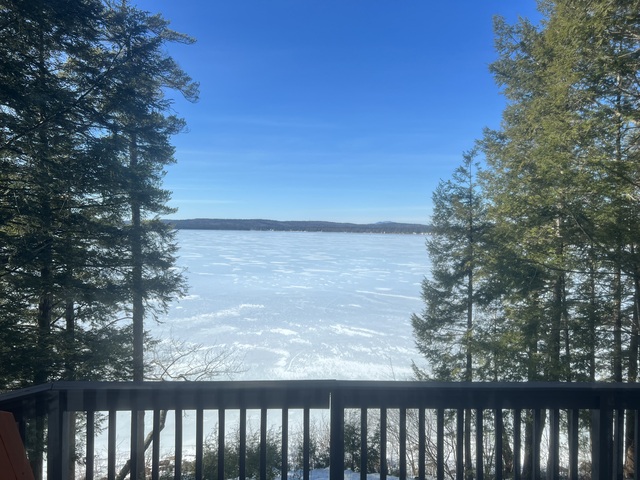
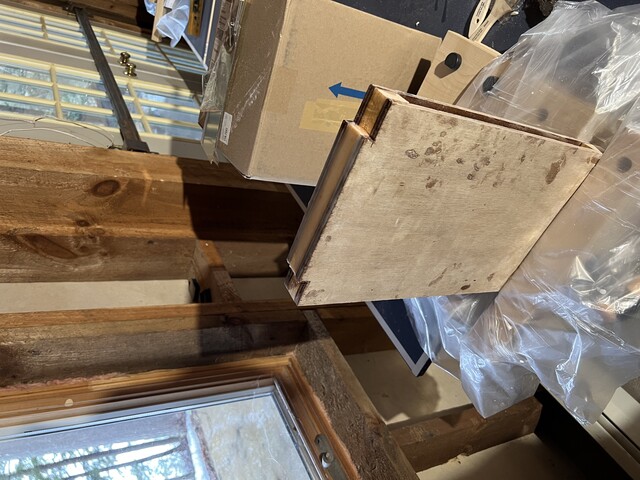
August 1: The advice (a couple of weeks ago) was to scrub the
affected wood with diluted bleach, and then let it dry in the sun. So
I did that. Note that this is the first photo showing the boat, and
the lake in which it will eventually float (let's hope).
Moving on.
The exterior of the bottom and first panels were covered with fiberglass and then a few layers of epoxy. I proceeded after great trepidation, but it went pretty well.
Now I have to do the same to the bottom and first panels on the interior of the boat. There are a few problems here.
First, the exterior of the boat's hull is convex. (Digression: In grad school, I happened to be around people who were getting the field of computational geometry started. And one of the first problems examined was computing the "convex hull" of a set of points — basically what you would get by stretching a rubber band around all the points. The problem is to compute the shape of that rubber band, which is a convex polygon. This is a very cute problem because it is definitely geometric, but the solution uses extremely little geometry. It is basically the same problem as sorting. Anyway, here I am, about 40 years later, working on a very different kind of convex hull.)
But the interior of the boat is definitely not convex. The interior is interrupted by vertical frames, so the fiberglass needs to go up to but not past those frames. And the ends of the boat, come together in V shapes, and the fiberglass has to conform to those shapes. And fiberglass is very floppy, so it is tricky to keep excess fiberglass from flopping into the parts that are being epoxied.
Second, the seam between the bottom and first panels was, per instructions, covered with wet epoxy. So getting the fiberglass smooth, with the angles, and the frames, and the V shapes at the end of the boat, oh, and the somewhat rough interior catching the fiberglass, AND the clock ticking, while the epoxy in the seams was drying — all that made for a very difficult and somewhat frantic epoxying session.
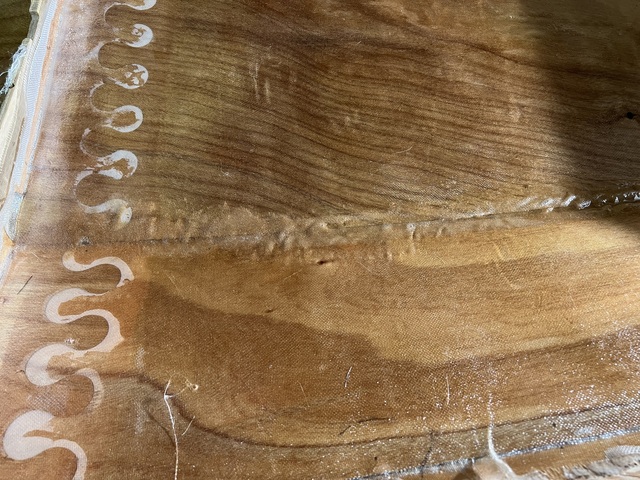
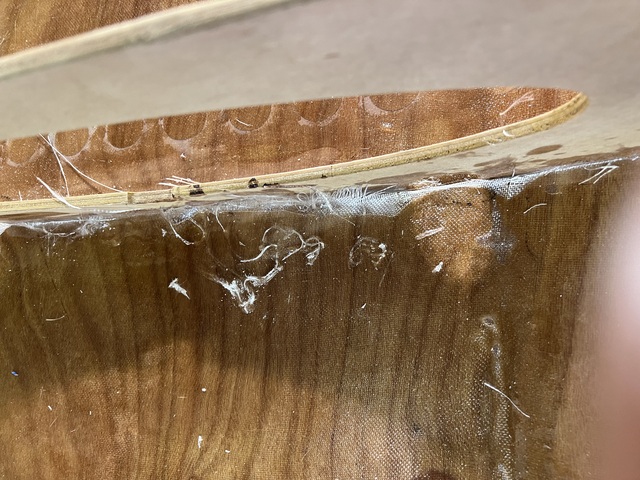
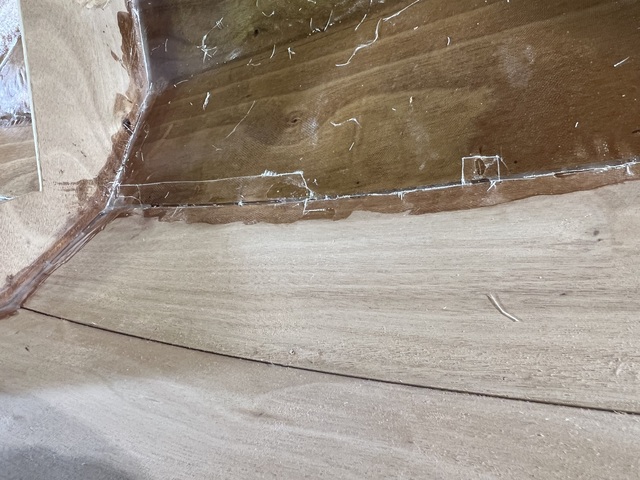
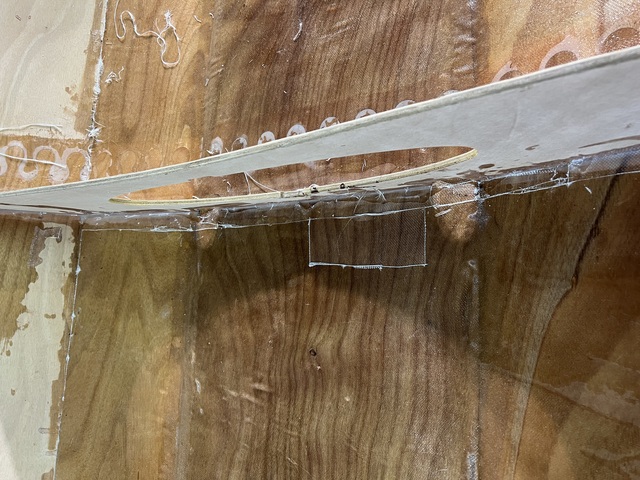
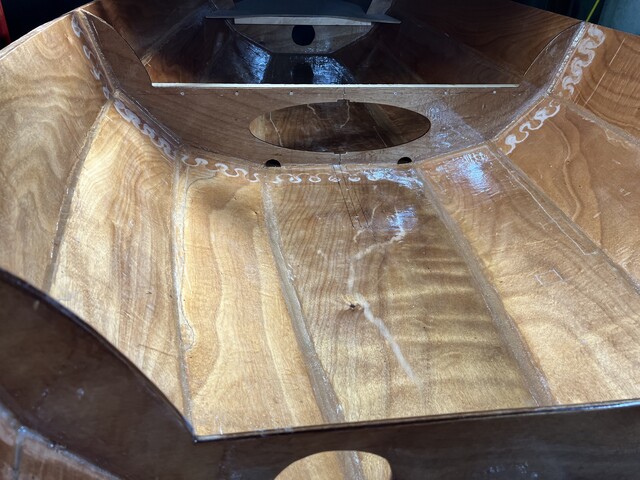
Here is the interior after all the glass was epoxied:
It's kind of a mess. Lose strands of fiberglass all over the place,
blisters, and wrinkles.

My plan is to use the heat gun and a knife to carve out the
defects, and then apply a patch.
Do you see? You see why this is taking so long? Every time I spend N hours doing something to this boat, I have to spend about 5 x N hours cleaning up my incompetent work.
It's September 1, 2022. It's cold and windy, and we are leaving
tomorrow. We are going back to Somerville, and Hannah is going to LA
for a wedding and then back to Brooklyn. We will chauffeur Eloise back
to Brooklyn next week.
I haven't posted anything for a month, because it's all been the same: heat up parts of the interior fiberglass that I botched, cut it out, put in a patch, cover with epoxy. That's almost done. It really isn't pretty. It looks like a Frankenstein boat, with all the patches and seams, but hopefully the fiberglass and epoxy will do their job and keep the wood protected.
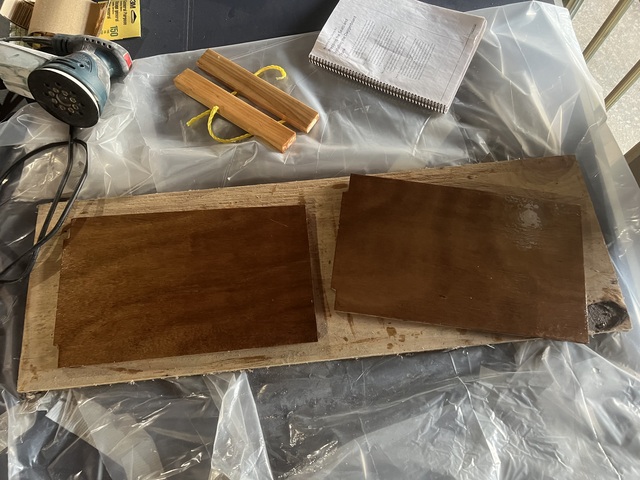
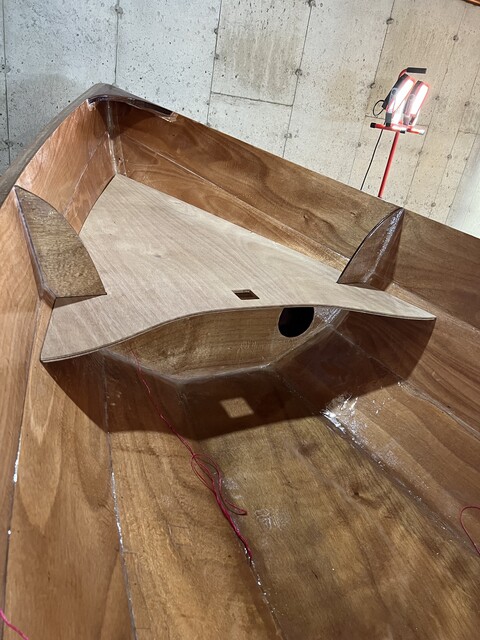
Next, I need to install the seats, at the ends and middle of the boat. And the box that holds the centerboard (the centerboard trunk) needs to be assembled and installed. I needed to deal with mold, as with the frames, so the sanded and bleached pieces are drying outside right now.
But I already see the next problem. The center frame is bent. As
with the breasthooks, the boat is
slightly too narrow. In this case, the frame is bent to
compensate. That means that the top of the frame points aft (toward
the back of the boat), and the centerboard trunk won't fit right. The
frame and the bottom panel should form a right angle, and because of
the bend in the frame, the angle is a bit more than 90 degrees, so the
centerboard trunk doesn't line up right.
CLC support tells me to use straps or something similar to apply pressure and bend the frame into shape. Braces. For my boat. I'm trying to figure out how and where to place the boat in the basement, where to attach the straps, so that everything stays in place while the frame is gradually modified. I've also written to the CLC forums for advice.
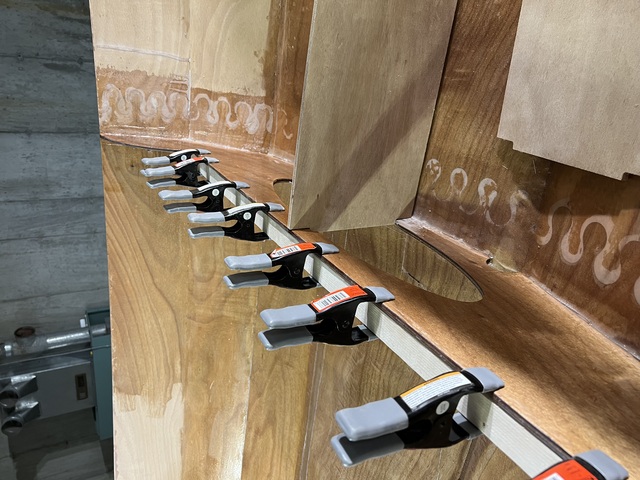
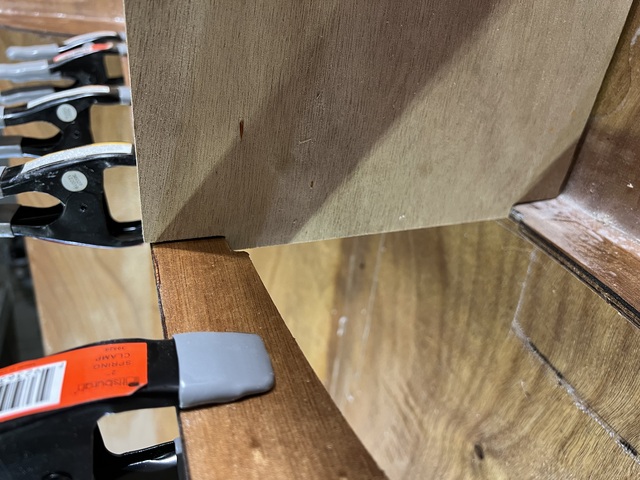
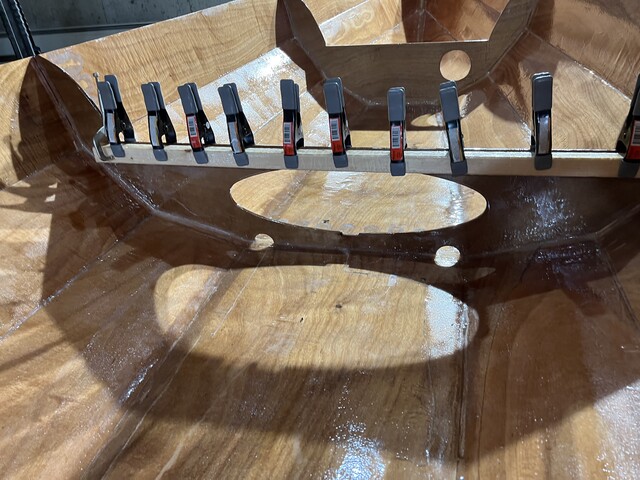
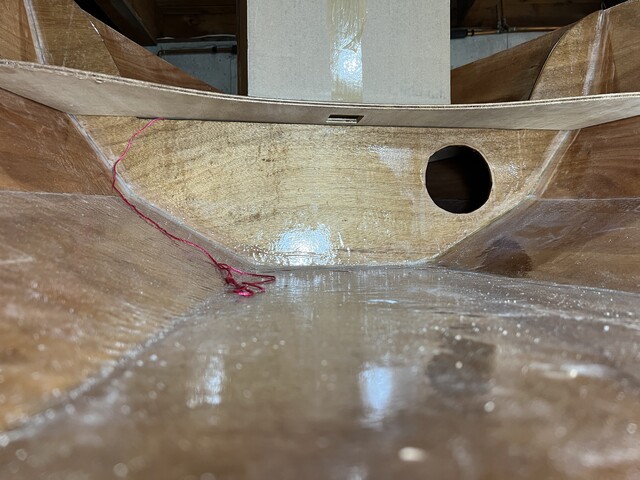
October 14: I got lots of ideas from the CLC forum. One idea was to attach a strip of lumber to the bent frame, to straighten it out, allowing the centerboard trunk to line up. I tried that idea using clamps, and it seems to work!
Here is the frame and centerboard trunk without clamps. Notice that
the top notch of the centerboard trunk does not reach the cutout in
the frame.
And with clamps. They do meet!
So I have a plan. I still need to assemble the centerboard trunk, and finish the interior — lots of sanding and epoxying for all of that. Once that is done, I should be able to install the centerboard trunk permanently, (using epoxy and screws instead of clamps).
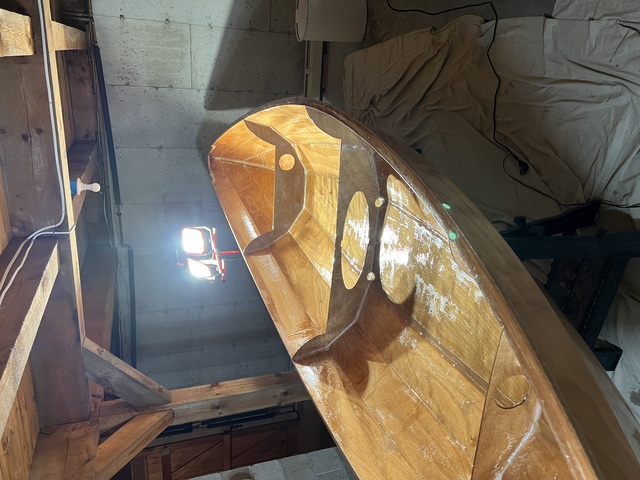
January 16, 2023: The boat is back in the basement for the
winter. More sanding. More epoxy. This is right after the 2nd coat of
epoxy.
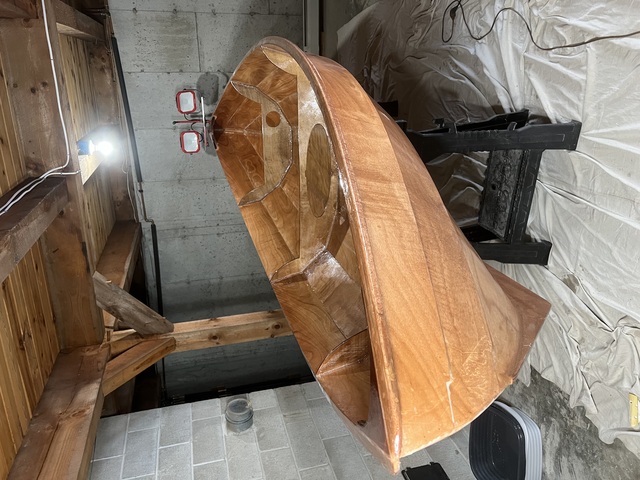
February 12, 2023: More of the same. Here is a picture, but it
really looks the same. More sanding, more epoxy.
In related developments, I'm also continuing to sand and epoxy the
pieces of the centerboard trunk.
And today's weather is bright and sunny, high in the low 40s.
Or that's what I think, anyway. The CLC kit ships with large containers of epoxy and resin. I have had to buy a second pair of the same size. And a third, smaller pair. I hope I don't run out.
I have a very heavy hand with epoxy. The boat should weigh 100 lbs. when done. I suspect that mine will be quite a bit more, maybe 20-30% more. I use epoxy to cover mistakes, like the badly fiberglassed interior. I use excess epoxy because I am paranoid about missing spots, and water coming into contact with wood. I use more coats of epoxy than I should because there were spots where the epoxy took on a weird texture, so I figured more sanding and more epoxy would fix the problem, (maybe it did a little). Basically, I throw epoxy at any problem I encounter. So this boat has a LOT of epoxy on it.
Expert makers of this sort of boat go with a natural finish,
just varnish on top of the epoxy. I had been thinking about
painting, as a way to cover my many, many mistakes. But you know
what? I'm just going to own the flaws. I mean, look at this (from
the CLC website). This is the boat I'm building, in its rowboat
configuration:
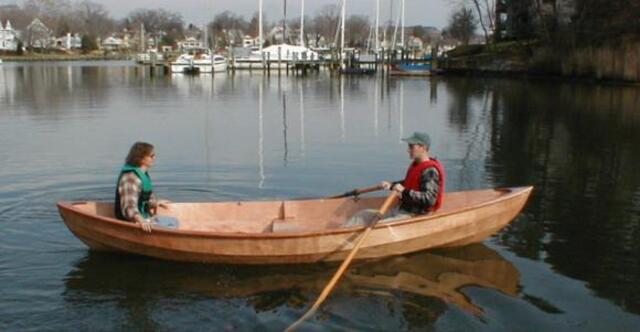
Mine won't look this good, but a natural finish, with all the flaws visible, will remind me of building the boat. Good times, good times.
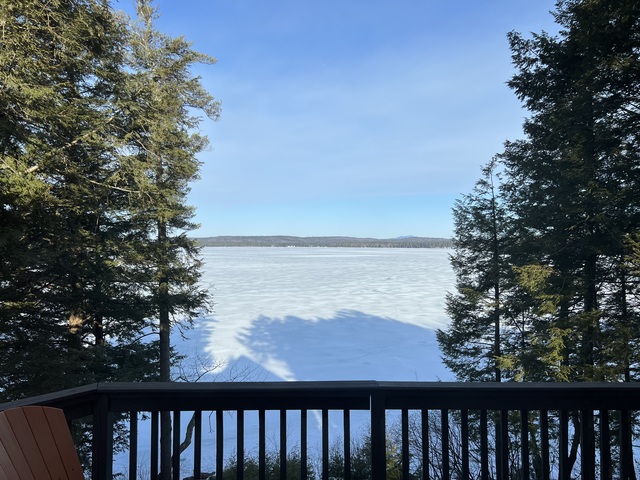
It's March 29, 2023. It isn't very cold, but the lake is still
frozen.
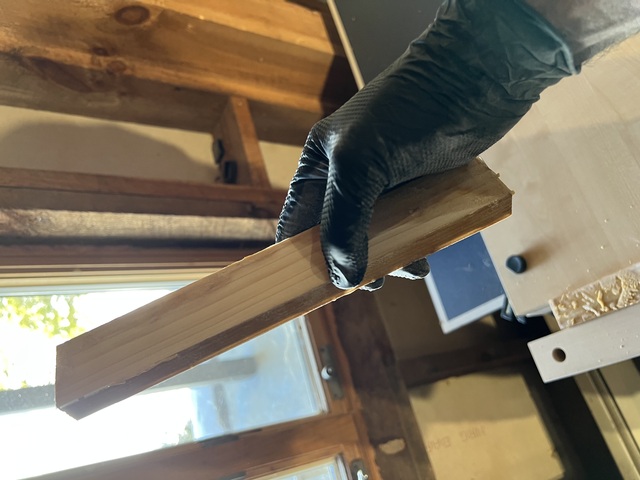
I have a number of small pieces of wood that I need to epoxy on all
sides. These are spacers, that separate the two sides of the
centerboard trunk.
I would normally cover three sides, and then another day, cover the side that was face down while the other three sides were setting. I thought I'd save time. So I covered all four sides, and set the pieces on pieces of nylon rope. I expected that the side lying on the rope would not be smooth, but that I could sand it out later. These pieces are separators between other pieces of wood, so they should be sanded anyway before being epoxied in place.
Here is the rope I used.
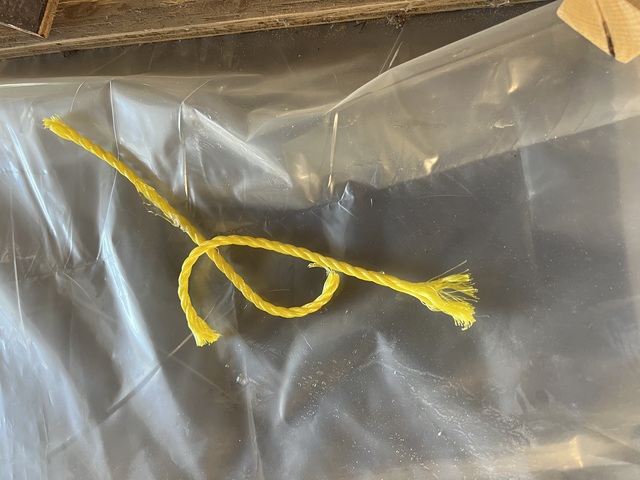
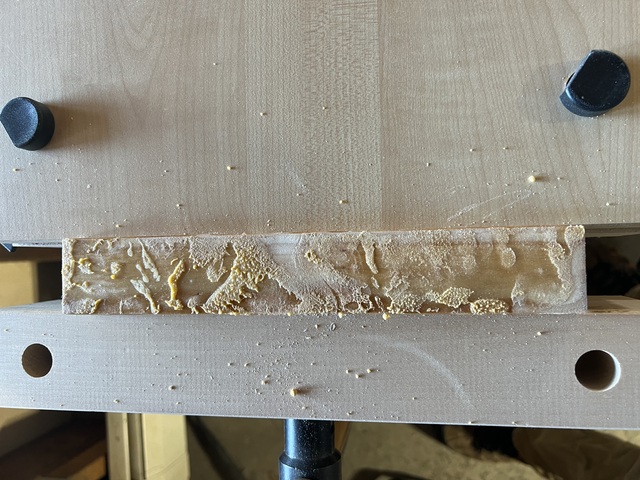
Of course it didn't work. I was able to easily remove the
rope from the dried epoxy. And as expected, the surface was
uneven. So I started sanding. But instead of the hard surface that
results when epoxy sets normally, there was this softer surface. The
nylon from the rope was apparently dissolved into the setting epoxy,
and sanding it created this goopy snot-like stuff.
I was finally able to clean off the surface completely, down to the wood, and I epoxied it again (more epoxy — yay!), no nylon rope involved this time.
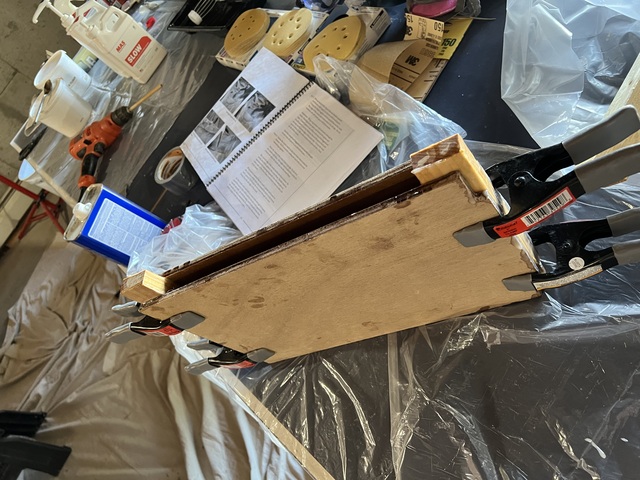
Next day. I reapplied epoxy to the spacers, and assembled the
centerboard trunk. I'll return in a few days to see what went wrong.
April 4: Not perfectly assembled, because the spacers moved a
bit. But it should be okay. I trimmed the spacers and applied some
thickened epoxy to fill in gaps between the sides and spacers.
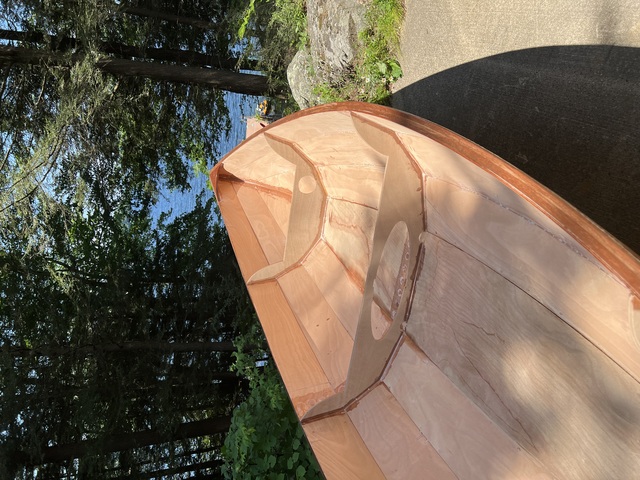
It's May 2, 2023. The lake ice melted last month, and today we had a
brief hailstorm. The first one I've ever seen here.
Observant readers will recall that I made the hull slightly too narrow, and that the frames are bent, and this causes the centerboard trunk to not fit. And that I worked out a fix involving a strut to shape the frame. (If you aren't an observant reader, just scroll up a bit.)
So today was the day that I finally played orthodontist. And boy was I organized. I planned out everything:
First, I put the boat on the floor, figuring that it would be
better to sit in the boat to do this work, instead of reaching across
from the sides. (This is the first time I've sat in the boat!)
And it all went nearly perfectly. Now about step 14: I was going to
use my drill to tighten the screws. But this was the moment that,
after four years of trusty service, my drill decided to seize up. I
could not turn the turny thing that loosens and tightens the teethy
things that hold the drill bit (or chopstick) in place.
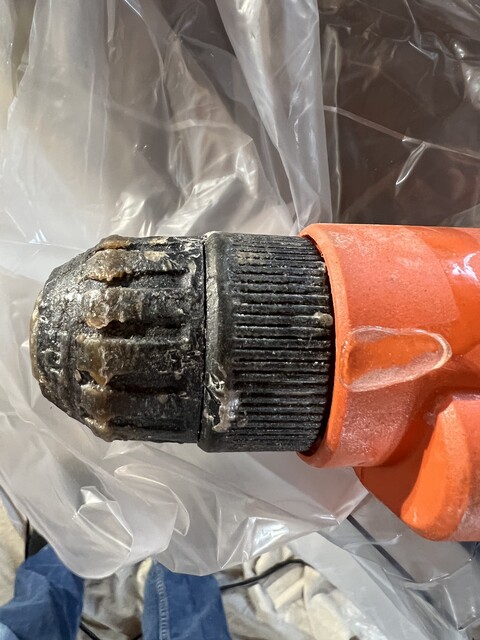
It was working fine, a few minutes earlier, when I was mixing epoxy, but now it was stuck. Fortunately, I had screw wax handy (so organized!), and coating the screws with the wax, combined with my precision-drilled pilot holes, I was able to put in the screws manually.
And here we are:
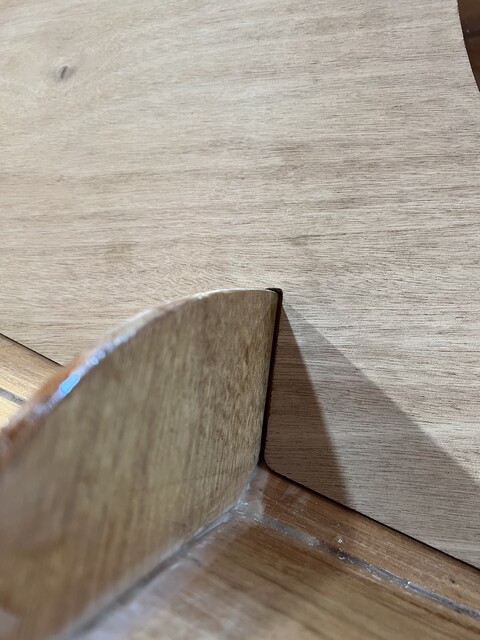
May 3, 2023. With the middle frame now reshaped, the centerboard trunk should
now fit. It's in the right ballpark, but the notches in the frame and
the trunk don't quite fit.
I used the shinto rasp to sand the notches on both parts. It now
fits, but this sanding also introduced some gaps between the trunk and
frame.

I'll ask the CLC forum about those gaps, but I'm guessing that I'll need to glue in some shims.
The bottom of the trunk does meet the bottom panel nicely. Next, I needed to make sure that the other end of the trunk is aligned along the center of the boat. This needs to be really precise, otherwise the bottom of the boat, including the keel, will be at an angle to the centerboard, which can't be good.
Finding the exact centerline isn't trivial. The bottom panel isn't
quite flat. The seam where it meets the next panel isn't a straight
line. The manual suggests checking that the center of the top end of
the trunk is equidistant from matching points on the left and right
sides of the hull (the "ears" on either side of the forward frame):
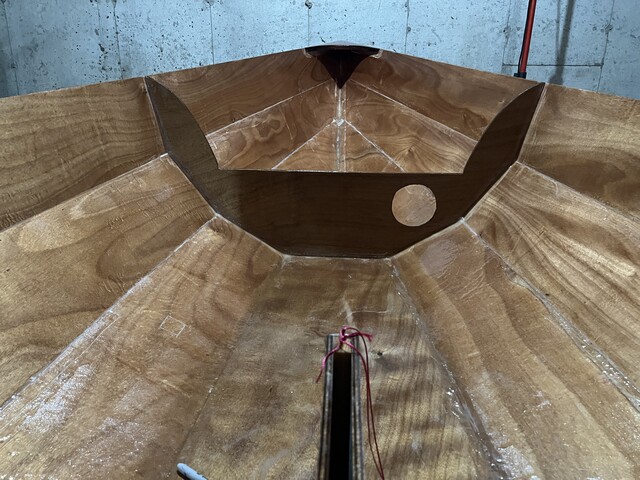
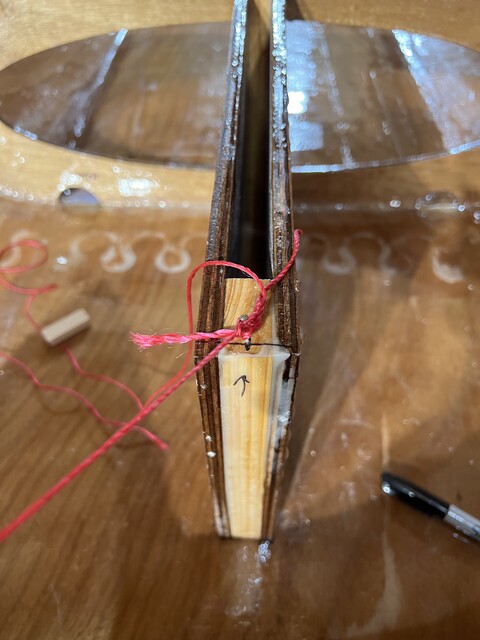
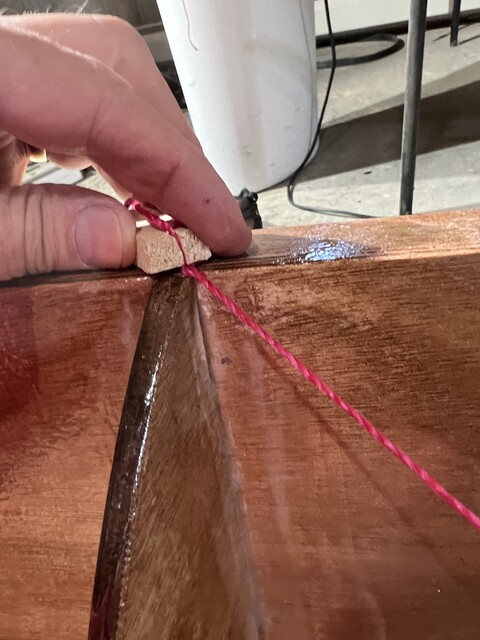
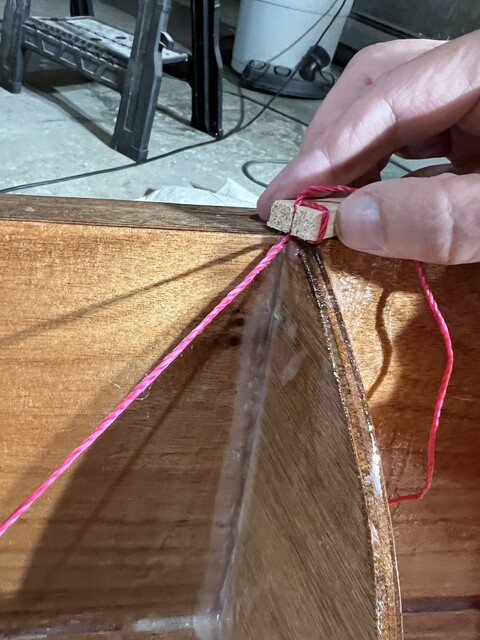
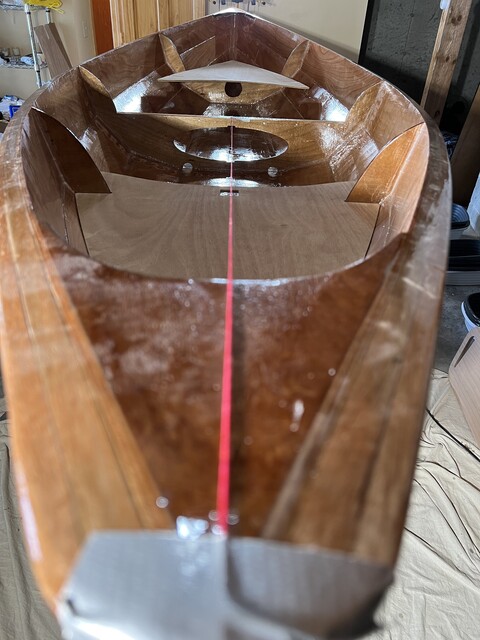
I put a nail into the top center of the trunk, and tied some string
around it. Then I stretched the string to each of the ears, and
compared the distance on the left and right sides. I adjusted the
angle of the trunk until the distances matched.
With the trunk angle worked out, I marked the trunk's position on
the bottom panel.
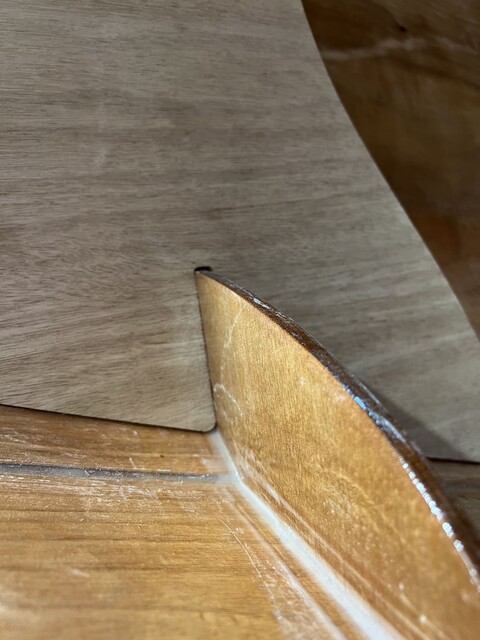
May 4, 2023. The back frame is really bent. And it's short, so bracing it isn't as successful as with the middle frame. I clamped on a strut, and the frame doesn't straighten completely. The seat that fits over the frame has two slots cut out (for the "ears") of the frame, and it really doesn't fit well right now. I will straighten the frame as best I can, but will probably need to do some shaping of the seat. I think (based on some measurements) and hope that the exterior of the boat is more symmetrical.
Anyway, here is the rear frame, with its strut, epoxied and
clamped. I'll screw it in on my next visit.
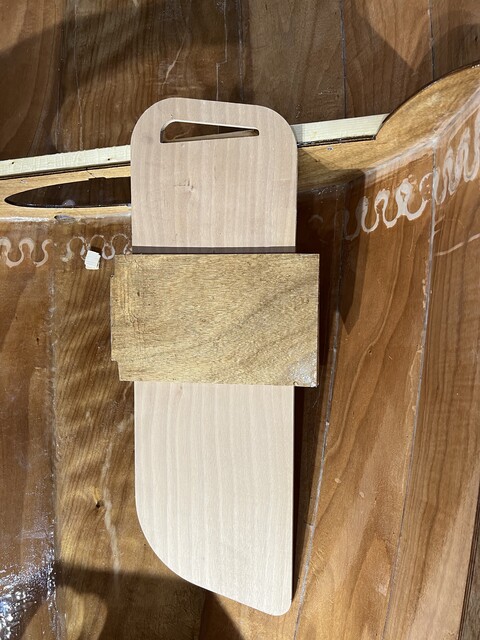
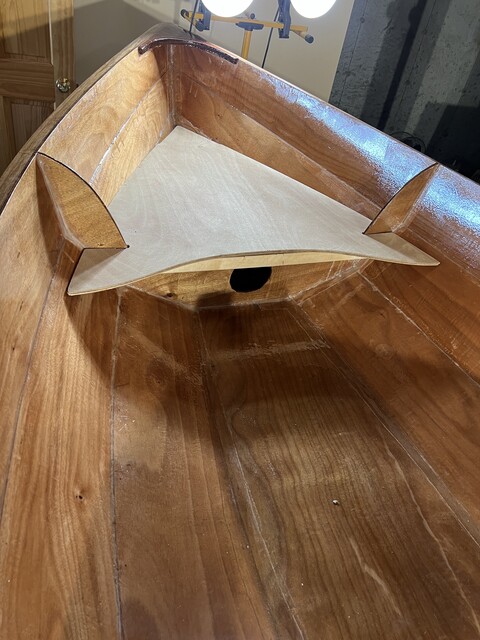
It's May 9, 2023. I am neck deep in dealing with previous errors. The boat is too narrow, so the frames are bent, so the seats don't fit onto the frames quite right. I straightened the frames as much as I could, so it is now time to fit the seats.
There are three seats, one at each end of the boat, and one in the
middle. Of these, the seat at the front (bow) end fits best, because
that frame is not very bent. But the seat doesn't fit well enough.
It appears pretty symmetrical. The square cutout in the seat is where
the mast will go. It does appear to be right in the center. (That pink
string marking the center looks offset slightly to the right of the
picture, but that seems to be an artifact of me trying to get the
picture with my iPhone, its many lenses, and its extensive software
intervention.)
But the seat doesn't rest against the frame. Here is a view from below
the seat:
Also, the whole seat is too far forward. The front of the seat slots
are tight against the frame:
But the rear of the seat slots have a gap:
In other words, the narrowed hull pushes the seat too far back, and that prevents it from settling down against the top of the frame. I think that I will widen the slots on the seat. I've asked about this on the CLC forum. My guesses about how to fix my many, many errors, have been pretty good, usually not too far off from what the wise people of the forum recommend. CLC support is also on the case, (thanks Nicky!).
It's getting to be time for another visit to Mark. I'm going to need his tools again, to trim the slots. I'll also need to borrow a router, to cut a slot in the bottom of the boat for the centerboard.
Speaking of which, the centerboard actually does fit in the
centerboard frame!
May 10, 2023. On the CLC forums, Laszlo suggested cutting out a cardboard template to match the seat, fit it onto the frames, trim the template to fit, and then apply those changes to the seat. This is similar to what I did with the breasthooks. Nicky, at CLC support, suggested just grinding down the seat where necessary.
The CLC forums provide useful advice. But not just advice, it's
also a maternal pat on the head, "there, there, it will be fine." Even
experienced builders find that things don't fit, and they add shims,
sand things down, and in general, just do what is necessary to get all
the parts to fit together. I started to think about my building this boat as
one of those slow thrillers,
like The
Conversation, in which the protagonist's previous actions, and
psychological flaws accumulate, and interact, and finally result in
his complete emotional destruction.
I forgot to temporarily include the breasthooks while wiring up the panels. That resulted in the hull being an imperceptible 1.5% too narrow. This caused the frames to slightly buckle. I only noticed that when I first tried to fit the seats onto the frames. I expected this to continue to the point that I finally launch the boat and it collapses and sinks as soon as it touches the water.
But no, it's more Don't Worry, Be Happy.
I decided to go with Nicky's suggestion. First, I think the bow seat was really close to fitting, needing corrections measured in small numbers of millimeters. Second, cardboard isn't as stiff as wood, and I suspected that the cardboard sagging would result in inaccuracies. Also, there would be errors in translating the changes to the actual seat (as with the breasthooks).
The grinding worked! It was a lot like getting the keel to fit. Figure out where the seat was contacting the hull or frame in the wrong place, sand that down, repeat. Finding those contact points was not easy, but with enough close inspection, and pushing and prodding to see where the seat moved, and where it was stuck, I did figure it out.
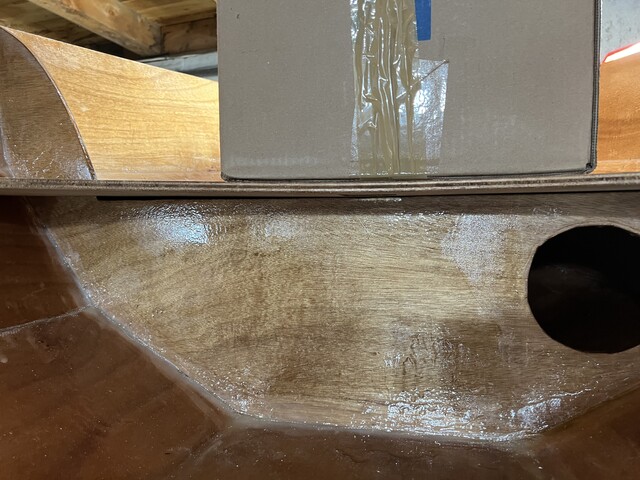
Putting some weight on the seat (the box in this photo), reduced
the gap between the seat and frame. Here's the gap early on:
More dentistry analogies: I just had a crown put on a bad
tooth. The dentist checked the fit by having me grind a piece of
carbon paper (to see where the carbon goes on the crown), and using
floss. That's basically what I did here. Except that instead of
carbon paper, I wiggled the seat to see where it was sticking. This
photo shows the string I was using as floss.

By the way, the Sjöbergs Smart Vise was incredibly useful for this
work. I put the seat into the vise, and then sanded using the shinto
rasp, or a piece of the adhesive sandpaper (convenient because I
could get long strips of sandpaper to fit into the slots on the
seat). Oh yeah, using all the tools.
And here it is:
This was all for the bow seat, the one in front. The middle and
rear (stern) seats fit much worse initially, but surprisingly, they
were much easier to grind into shape. I mostly just sanded the slots
where they contacted the frames, and they then fit nicely.
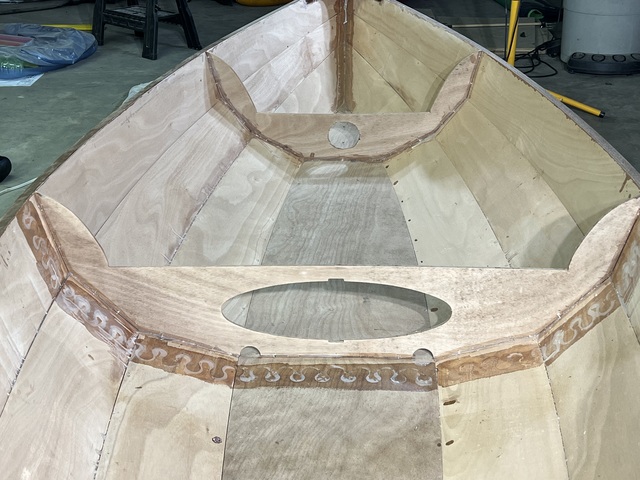
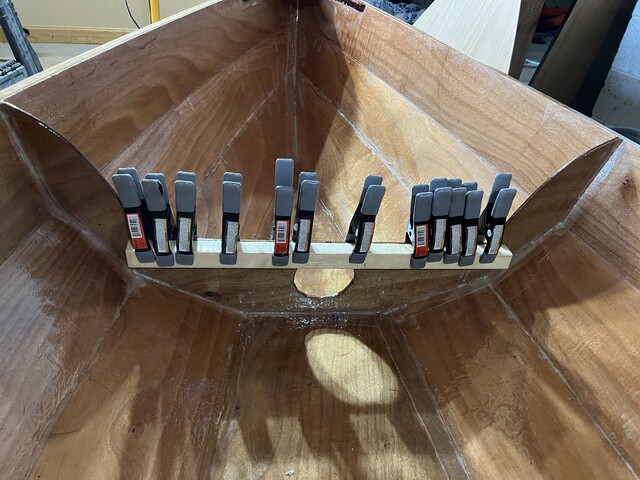
I finished up today by drilling holes in the middle frame and through the bottom of the boat for attaching the centerboard trunk later.
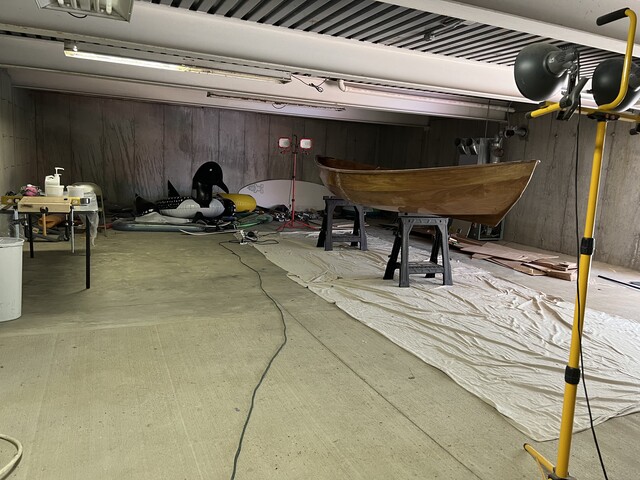
And now, it is time to clean up, and move back to the larger work area.

May 11, 2023. The basement is now empty (although there's a lot of
sawdust to be vacuumed). It is ready for use as a cat loo during the summer.
I hope this is the last time that I had to pick up the boat by one
side and carry it through the door to the lower garage. Thanks to a
couple more tons of epoxy, it's getting harder to do that maneuver. If
all goes well, I'll take the finished boat out the garage door, to the
lake this summer, and never have to move the boat into the basement
again.
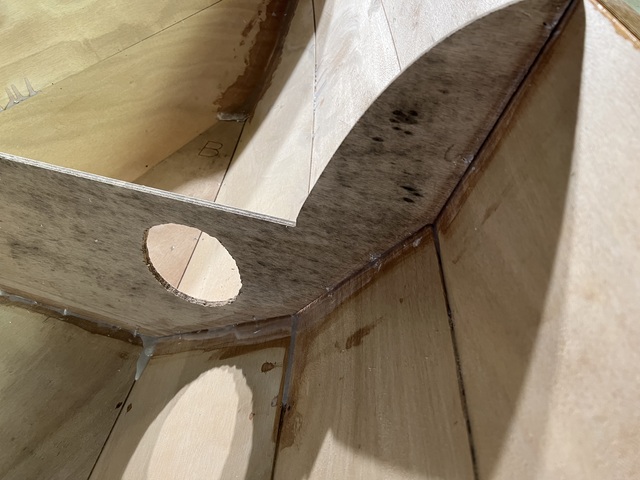
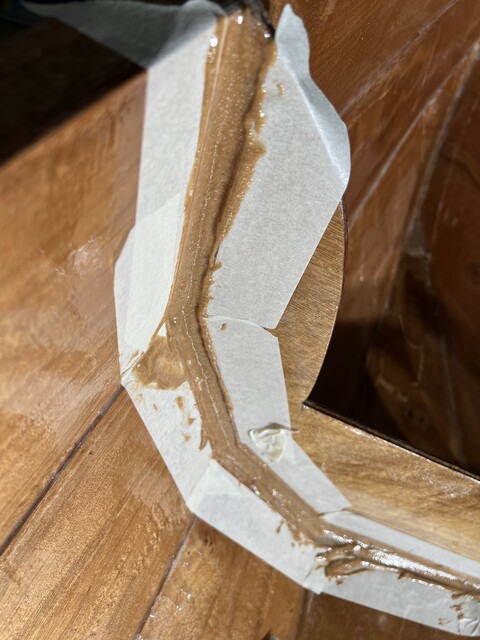
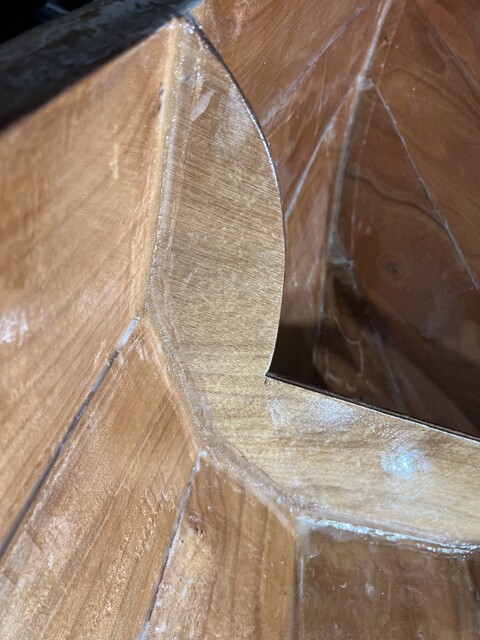
I thought that I could finish my boat by just applying the techniques that I've learned so far. But no. I had read ahead, and knew that I had to apply "fillets" to the interior of the boat, wherever the panels join (those seams run the length of the boat), and wherever the frames (the horizontal pieces) meet the panels. A fillet is a mixture of epoxy and wood flour that fills in these seams, creating a smooth gradient, a rounded corner. I thought I knew how to do this because it involved just more peanut butter consistency epoxy.
The manual advises creating 12 ounces of this mixture, putting it in a pastry bag, or a heavy duty ziploc bag, cutting off a corner, and squeezing it out along a seam. Seasoned pro that I am, pessimist that I am, this sounded like a very, very bad idea. First, I've run into trouble mixing that much epoxy. Second, I can easily imagine the bag splitting open under pressure, dumping epoxy all over my boat, making the interior look far worse than it already does, not to mention, probably a month of cleanup. So I wrote to the forum.
Laszlo (among others) agreed with me, about the risk of the bag splitting open. He recommended applying the epoxy with a putty knife.
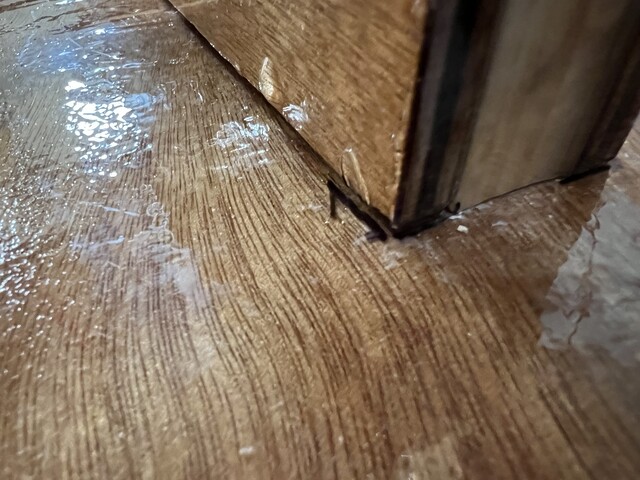
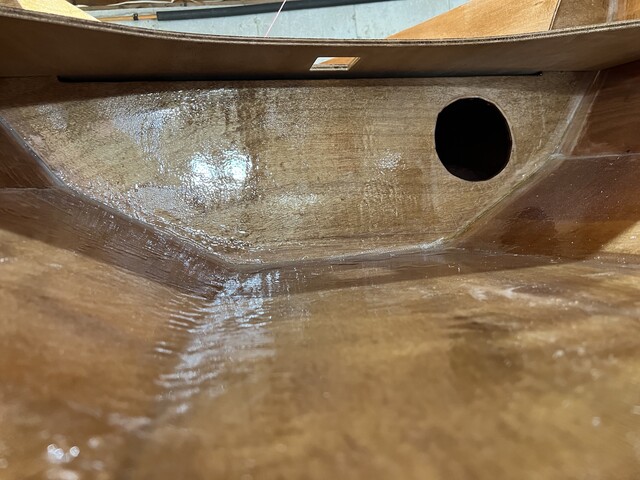
On one hand, I made basically no progress on the boat today. On the other hand, it was a day of learning. I experimented with fillets on the seam between the rear frame and the panels, behind the last frame. This area will not be visible in the finished boat, because it will be covered by the rear seat.
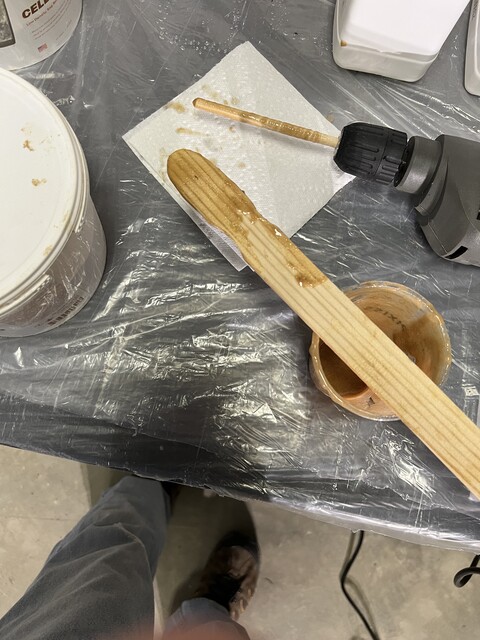
Lesson 1: So I mixed up some epoxy with wood flour, to peanut butter consistency, and tried applying it with a 1 1/2" putty knife. This was very thin peanut butter. Not really peanut butter consistency, if I'm being honest. This will be significant later. Anyway, it didn't work very well. I then noticed that Laszlo said that he used a rounded putty knife.
Lesson 2: I sanded down a paint stirrer to approximate a
rounded putty knife.
And I tried applying some more epoxy. It sort of worked, but it
provided very thin cover. The corner (between the frame and panel)
wasn't really as filled in and rounded as I think it should have
been.
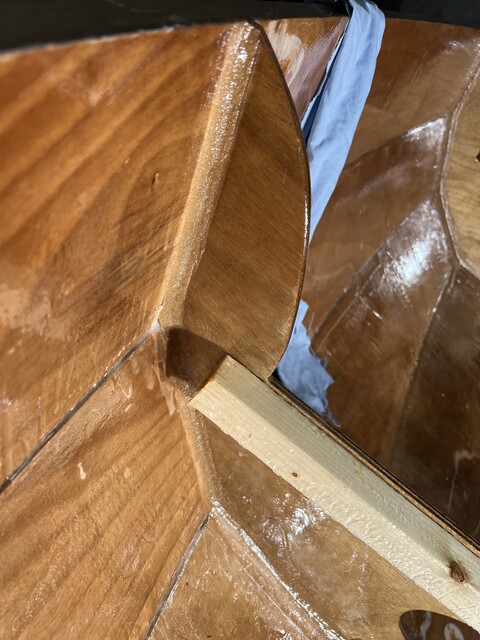
Lesson 3: Back to the forums. I started a discourse on condiments. The epoxy/wood flour mix I used was more like thick maple syrup, pourable, but only slowly. Should it be more like Skippy? That is an extremely thick peanut butter, not at all pourable. Or should it be more like organic peanut butter? That is not quite as thick as Skippy, but thicker than maple syrup. Bubblehead answered, and suggested that the epoxy should not be pourable. He didn't address the condiments issue directly, but it sounded like he was recommending something closer to organic than Skippy.
So I mixed up a little of that, and applied it to a to-be-hidden
area at the other end of the boat. And that seemed to work much better!
I do realize that the difference is not really visible in these
pictures, but in this last one, the corner is broader and rounder.
Bubblehead also suggested using masking tape on either side of the seam, to simplify cleanup, which is a good idea. Of course, cleaning up the masking tape can be difficult, but nowhere near as difficult as cleaning up epoxy.
So hopefully some actual progress tomorrow.
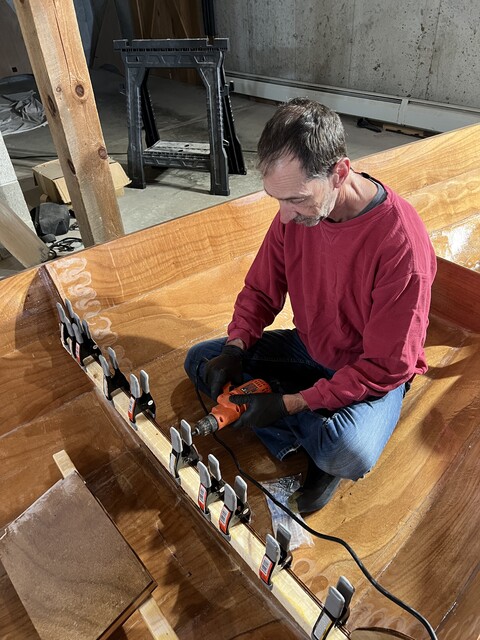
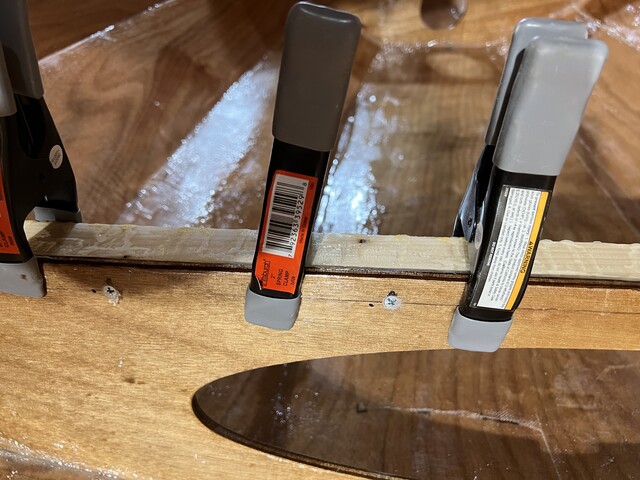
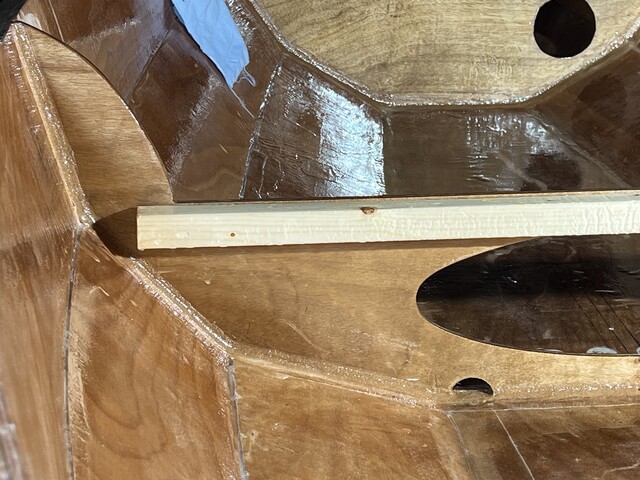
May 17, 2023: Actual progress! There was more advice on the CLC forums. Now that the condiment issue has been settled (the epoxy should be like organic peanut butter), there were other controversies. Use pastry bags to squeeze out epoxy along seams, or slather it on using a stick? What shape stick? Work cleanly and scrape up excess epoxy with a putty knife, or put down masking tape? How much epoxy in each batch?
I considered all the advice. I thought about my abilities in wrangling epoxy. I stroked my beard and furrowed my brow. And this is what I decided:
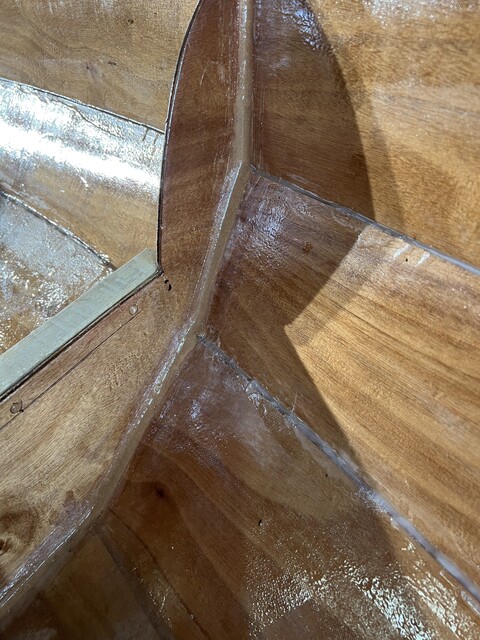
It seems to have gone well, and I got three fillets done
today. Some choice views:
May 25, 2023. Dramatic sunset tonight.


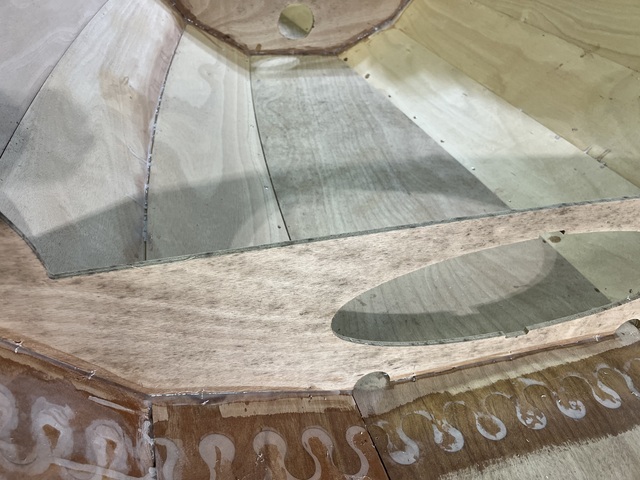
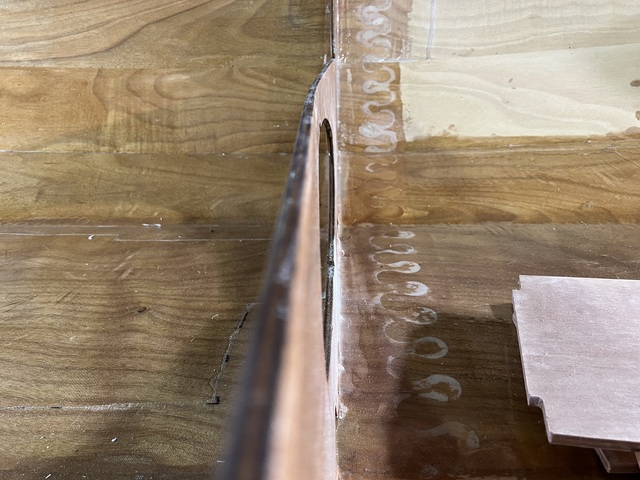
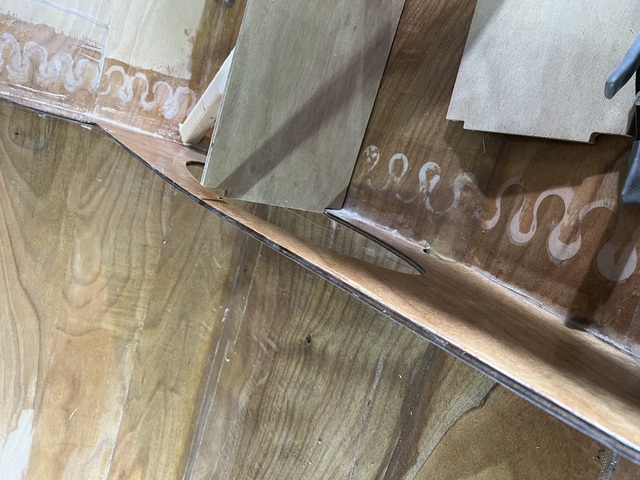
I have been putting in 3 days/week on the boat this month, so things are moving along quickly. Last week, I finished the fillets between the frames and panels. Now, I'm working on the fillets where the panels come together. That's maybe 70 feet: six seams running the length of the boat. For each section of the boat (between frames), I apply masking tape around each of the three seams; mix 5-6 oz. of epoxy with wood filler and silica; apply it; smooth it out; remove the masking tape; smooth it some more; and then about an hour later, final cleanup using an alcohol-soaked rag. Just one section remaining.
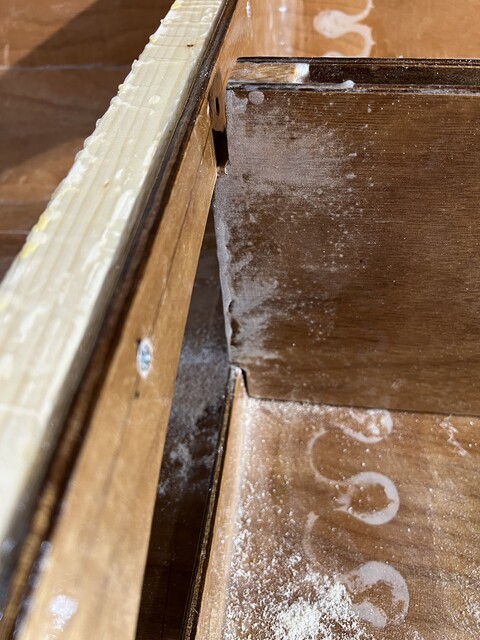
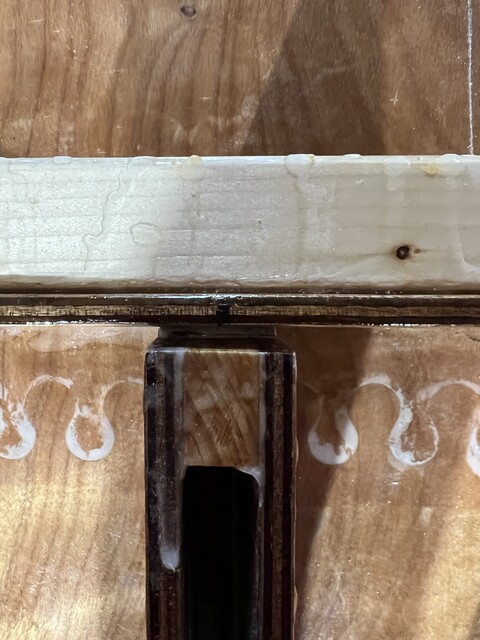
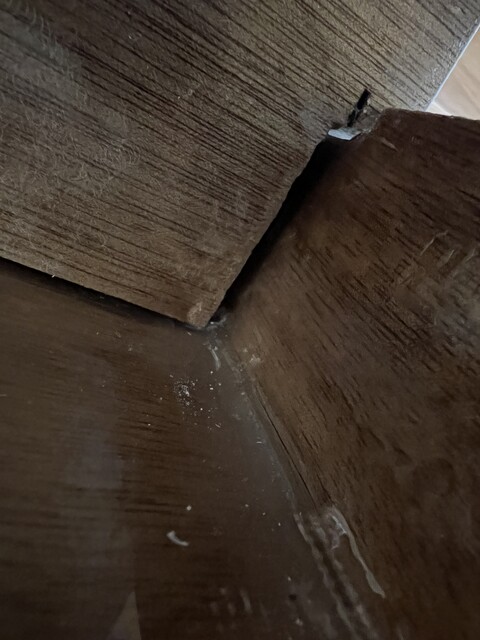
Here are some seams before the fillets are applied:
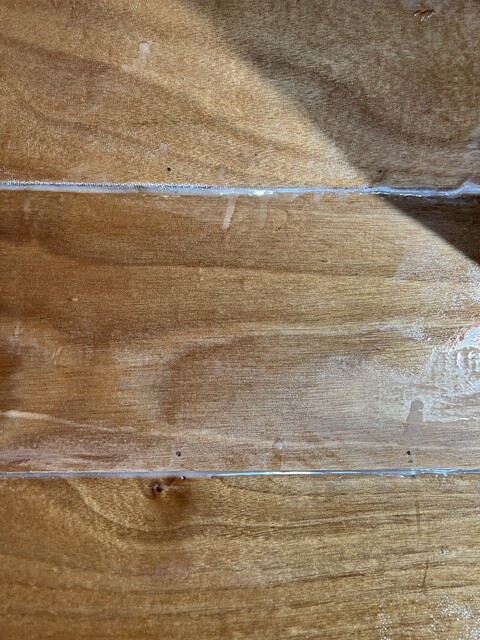
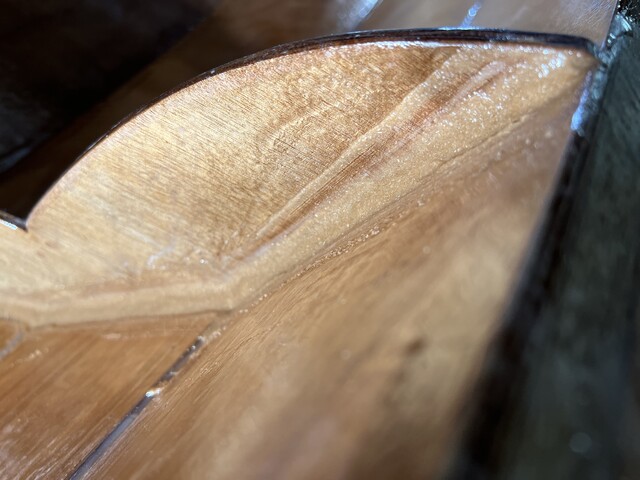
And after (from different parts of the boat):
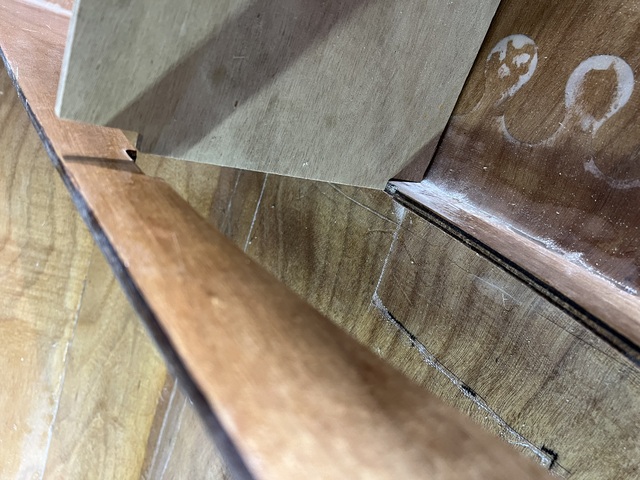
Here is one section with all the fillets done.
Once the fillets are done in the last section is done, I need to attach the centerboard trunk, and epoxy and install the seats.