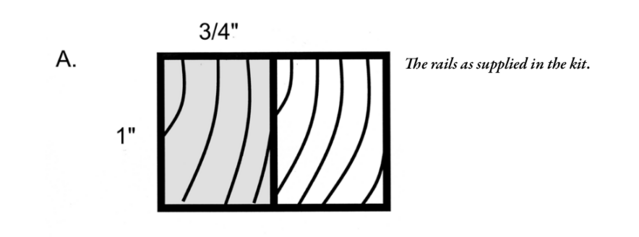
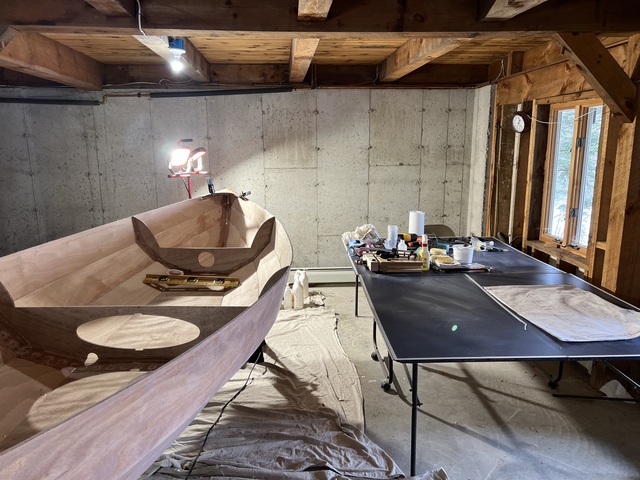
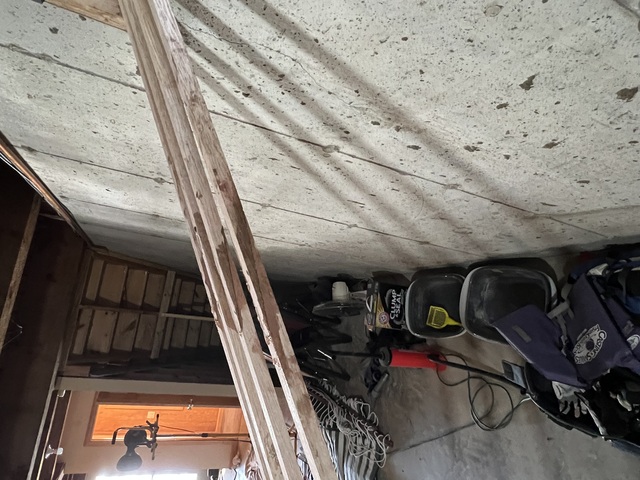
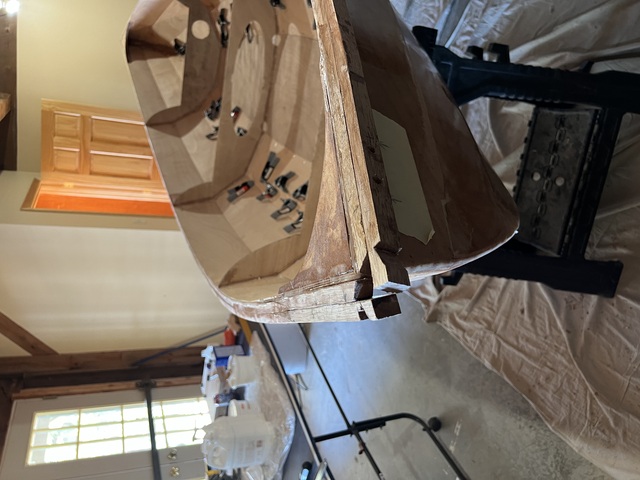
This boat is constructed of 6mm. thick plywood panels, and the edges of those panels are currently exposed around the edge of the boat. The next step is to install rails. These go around the boat, flush with the edge, adding strength and improving the appearance. A rail is a single strip of wood, 1" x 3/4" in cross-section, that traverses the length of the boat. Two rails are placed on each side, so on each side there are two 3/4" thick rails attached to each other.
As with the panels of the boat, rails are too long to be shipped as complete units, so each of the four rails is assembled from three pieces: two are about 8' long, and the last one is 2'. (The boat is 16' long, and the ends of the rails will be sawed off, but it's handy to have the longer pieces during assembly.)
Got it? 12 pieces. Four sets of 3. Each set of 3 has two 8' pieces and one 2' piece. All of them are straight.
So what on earth can this possibly mean?
The caption does say "rails as supplied in the kit." However:
This is even more puzzling than the Sjöbergs Smart Vise assembly instructions. So I call CLC, and a very helpful support person (they're all very helpful) sets me straight. That diagram is, technically speaking, a depiction of the rails. But not in the way you would expect. It is a picture two of the rail ends, side-by-side. And those curves? That is meant to evoke wood grain.
Look, this is stupid. If you are asked to provide a selfie, you
don't put your phone on the ground, stand over it, and get a
close-up of the interior of your nostrils. If you are giving driving
directions to a building, would you provide a photo of the front of the
building, or of the roof, taken from directly above? (The answer
might be different for flying directions.) Similarly, if
you — yes you, CLC — if you provide a diagram labeled "The rails as supplied in
the kit", then why on earth would you take a photo of the rail ends?
I mean, you got it right earlier in the manual:
Now to be fair, they are making a point, as the instructions call for
tapering the rails, and they are showing before and after diagrams,
(the puzzling diagram above is the "before" one). Here is the "after" diagram:
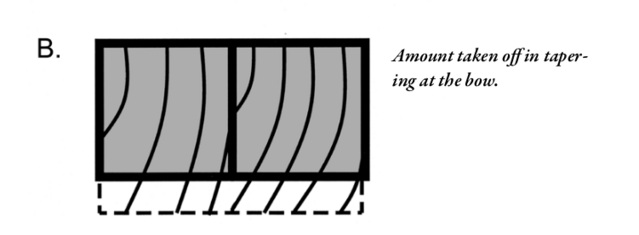
And the text does discuss tapering, but says "taper the rails ... as seen in the photo." BUT THAT'S NOT A PHOTO! I figured they were referring to some other photo. And that left me completely mystified about what was being described in the diagram.
I will concede, in hindsight, that mysteries 3 and 4 above (the 3/4" and 1" dimensions, the double-sided box), are now understandable. They are showing the two smaller dimensions of the rail. Pairs of pieces are taped together in the kit. I thought that they were claiming that each rail was 1" thick on one end, and 3/4" at the other.
Anyway, I know now how to proceed. Epoxy the three pieces of each rail to form one long rail. Taper the ends. Attach a rail to each side of the boat using clamps, epoxy, and screws. Then do the same with two more rails. Sand and shape to taste and that should be that. I'm going back to Maine tomorrow to get started on this part.
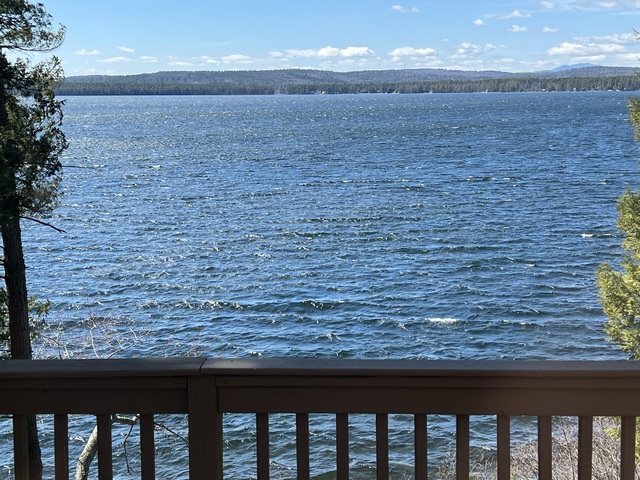
First, a weather report. For the first time this season, there is
no ice in the lake. Is this nice, or what?
Second, I did clean up my work area.
Third, I applied the last coat of epoxy. I delayed this previously, because the surface
wasn't as smooth as I was hoping for. But 1) it isn't that bad, and 2) I really want to get the
boat in the water this summer.

Okay, back to work.
Now that I actually RTFM and understand TFM, assembling the rails was pretty easy. The usual caveat applies, about discovering problems later. But at least carrying out the steps was easy.
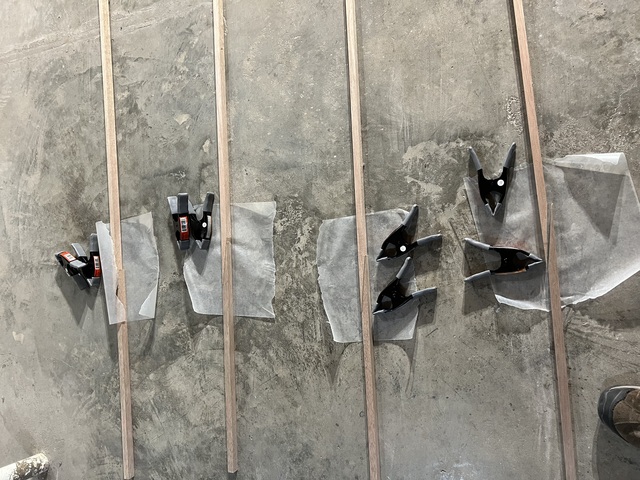
I laid out the rails in another part of the basement.
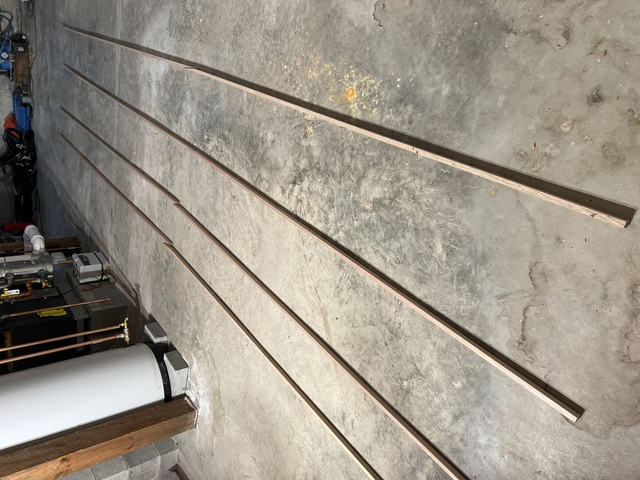
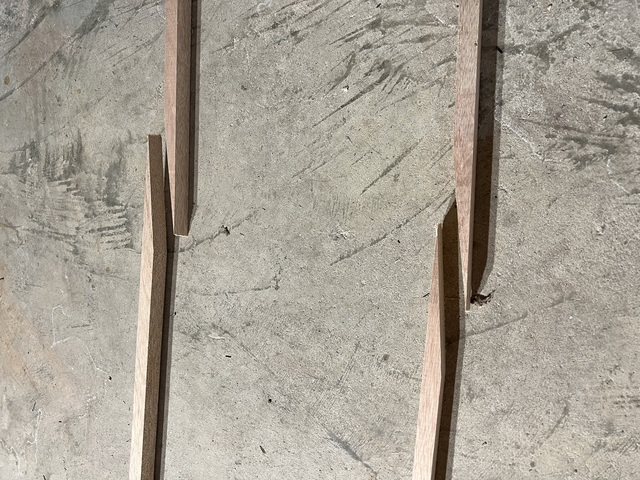
These are scarf joints. The diagonal parts get coated with
epoxy and put together.
I put a piece of wax paper under each joint, and set out the clamps I needed,
to hold the joints together as the epoxy is curing.
I mixed the epoxy, went to each joint, applied it to the faces of the joints,
put the pieces together, and applied the clamps.
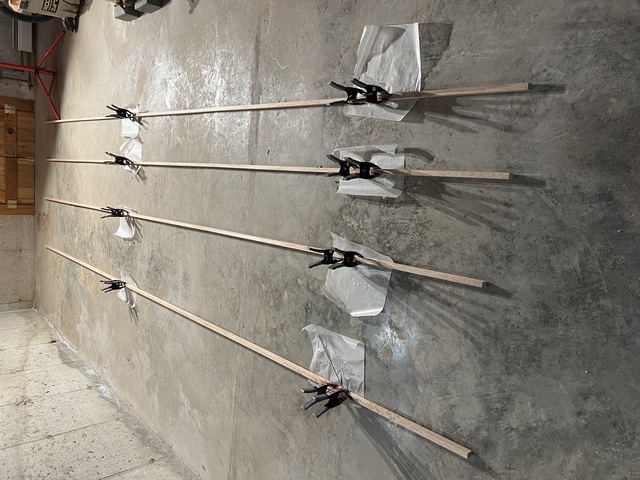
I'll check the joints tomorrow, but won't be able to do anything else before next week.
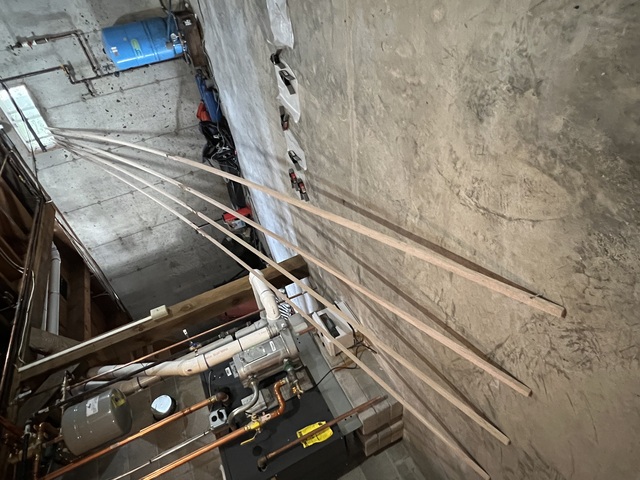
It is now a week later, and the rails have dried. They seem to be
good! A little cleanup is needed, but otherwise, I'm ready to start
attaching the rails to the hull. I'll start that tomorrow.
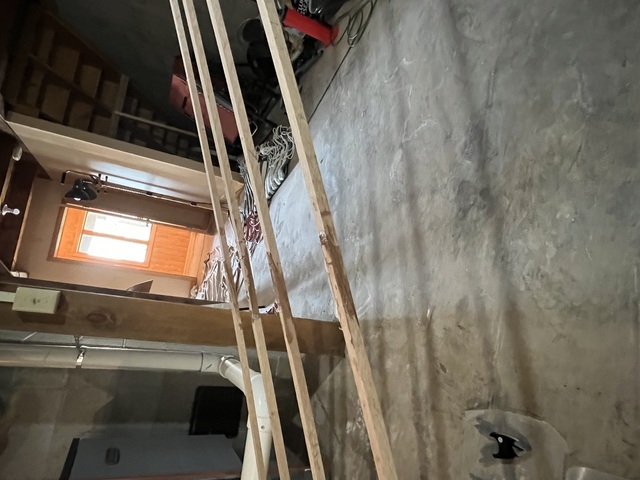
So I have four rails. On each side, one rail will be epoxied to the boat, and another will be epoxied to the first rail.
But the rails are straight and the boat is curved. The panels of the boat were forced into shape by wiring them together, epoxying, and then removing the wires. The rails will be curved by clamping them to the side of the boat, screwing them in temporarily, and then epoxying.
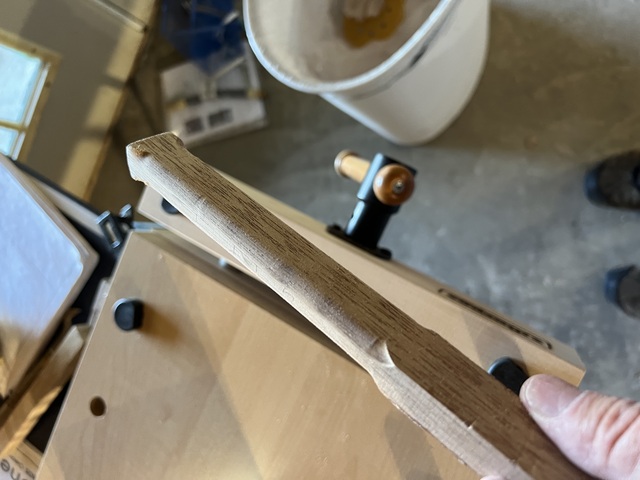
According to the manual, the ends of the rails need to be tapered. To make sure that I did taper the correct side of the rail, I called CLC support. They said that the tapering is needed to increase flexibility. This was confusing to me because I would expect that to increase flexibility, you would make the rail thinner. I.e., reduce the thickness of the rail, not it's height. But no, I was told that it is the rail height that needs to be reduced (1" to 3/4"), not the thickness (the 3/4" dimension), and that this would increase flexibility.
Okay, as I'm typing this, and re-reading the manual, I am confused. The manual says: Tapering the ends of the rails enhances their appearance enormously. The manual gives one reason for tapering (appearance), while support gives a different reason (flexibility). And the reason from support doesn't make sense to me. Also, it seems like tapering the height of the rail will be just about invisible.
Also confusing, in the manual: The rails are laminated to the sides of the boat; you’ll only taper the inner of the two layers. The outer layer will be planed to the same taper on the boat. Why? If, as the support person said, the tapering is done to increase flexibility, wouldn't it make sense to taper before? And if the tapering is for appearance, again, wouldn't it just be simpler to taper before installation?
Time for another call to CLC support.
Anyway, I did taper the inner rails, because that much is uncontroversial, even if the reason for doing so is unclear.
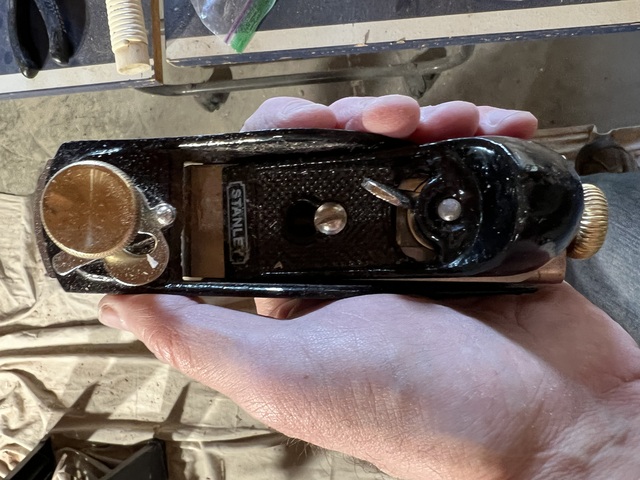
To do the tapering, I used a new tool, a block plane, a surprisingly complex little thing. There are two screws, one adjusting the amount by which the blade protrudes past the bottom surface of the plane, the other holding an adjustable plate in place. That plate slides back and forth to vary the width of the gap where the shavings make their exit. That plate is adjusted by a lever, and then there is another lever for the angle of the blade.
I watched some youtube videos to understand how all this works. And
sometimes it worked, and sometimes it didn't. When the plane didn't
work, it would either get stuck in the wood (blade protruding too
far); or it would slide back and forth with no resistance (blade not
protruding far enough). And further complications result from the
gap being too big or too small. I found it quite tricky to get
everything adjusted right, but I was occasionally able to get the
plane working. Look, shavings!
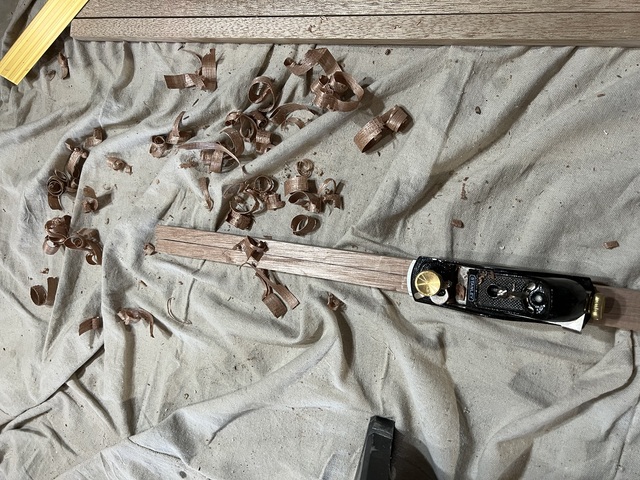
I finished the tapering and cleaned up the shavings. I am now cleaning up as I go along, since my workspace turned into such a disaster before. (In computer science terms, I am doing incremental garbage collection instead of stop-the-world garbage collection.) (Ed. note: "garbage collection" is actually a term of art in computer science.)
Then I turned the boat over, and fitted the rails to the boat with
clamps.

No epoxying until I call CLC and understand tapering better, and perhaps decide to taper the outer rails before installing them.
Next day: I called CLC and now I understand. The outer rails, when bent around the inner rails, will trace a slightly longer path. So tapering to match the inner rails before gluing them to the inner rails will result in mismatched tapers. Now needless to say, with my tapering skills, this wouldn't matter. My work with a plane is not so precise that it's going to matter. Also, I don't see how even skillful planing could produce a good taper. Getting a uniform angle for the taper from a plane, that removes wood in thin layers, seems impossible, (except asymptotically).
So here's my plan: I'm going to unclamp the inner rails, pencil in the taper that I want (starting with the currently tapered rails, of course), and then sand to get the taper right. Then attach the inner rails, and attach the outer rails. Finally, plane and sand the outer rails to match the inner rails.
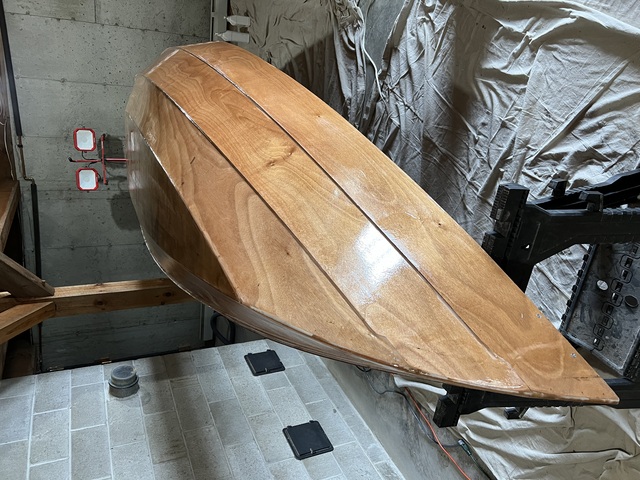
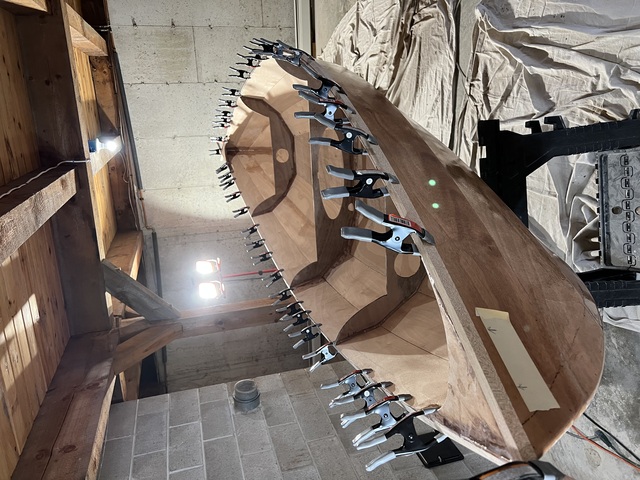
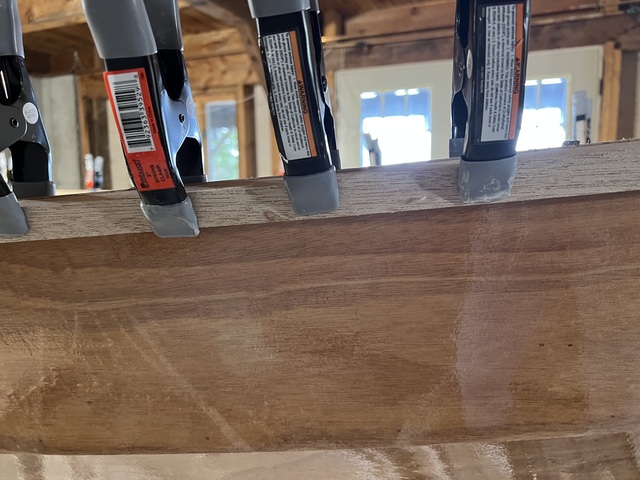
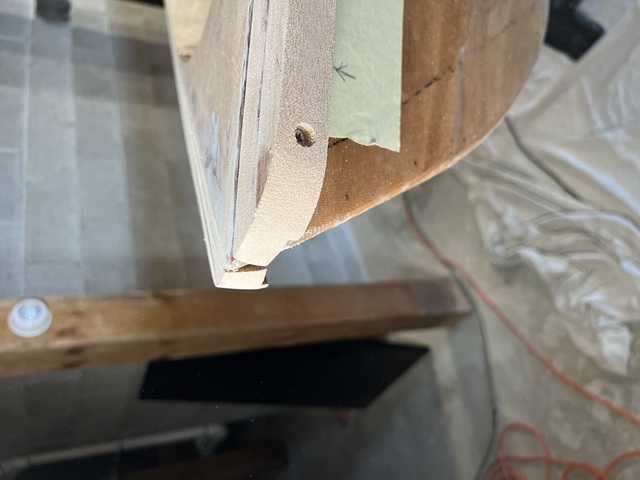
Today's project was to install the inner rails on the boat: epoxy them in place, and screw them in at each end. I'm mostly there.
The first side went pretty smoothly. This doesn't look much different
before, except this time, the rail is now installed permanently. The
clamps are there until the epoxy cures. And note those two screws,
that went in successfully. It doesn't always go that way.
The screws didn't go in so well on the other side. I managed to
drill way too deep, so I had to drill more holes. I'll patch these
up with filler later.
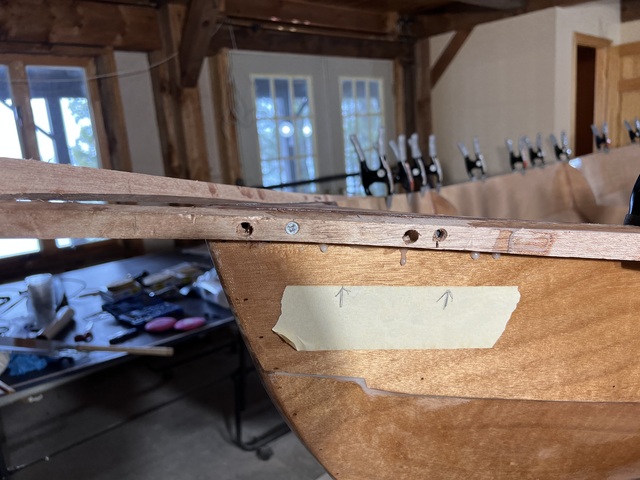
In dealing with one of these problem holes, I managed to strip a
screw. Can't go forward and can't go back. I will go crying to the
forums and CLC support to get help.
The rails were actually too long for the boat (by design), and had to be
sawed off. I got to use my Japanese hand saw.
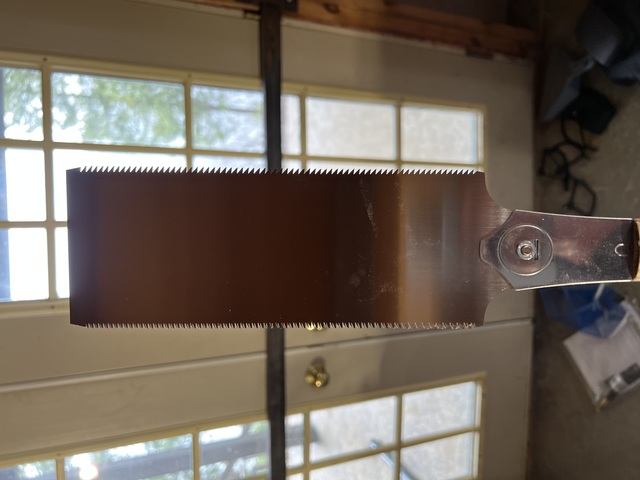
The saw is very thin. Just taking it out of its packaging, it vibrated and made a sound like a sword being removed from a scabbard, (in movies, at least).
This is an astonishingly good tool. My experience with sawing is that it takes a lot of effort, and results in a sore hand and arm. But this trimmed the rail in two easy strokes, much easier than I was anticipating. To be fair, the rail is pretty thin, but I expected more resistance.
Next day: It's April 28, 2022, and unseasonably cold, and windy.
We have been doing a lot of work on the house, getting ready for the summer, but also doing long-postponed maintenance. We put in a generator, because of increasingly bad storms, bringing down trees, and resulting in power outages. If that happens in winter, we lose heat, and then our pipes will freeze and burst. We replaced the furnace, because it started flaking out last summer, and it's 40 years old. While we were at it, we put in a bigger hot water tank. We're now off oil and on propane (furnace and generator). We're getting the motorboat detailed and fixing the problems it has accumulated over 15 years. (We're also getting a retractable top, so we don't roast out on the lake, on the really sunny days.)
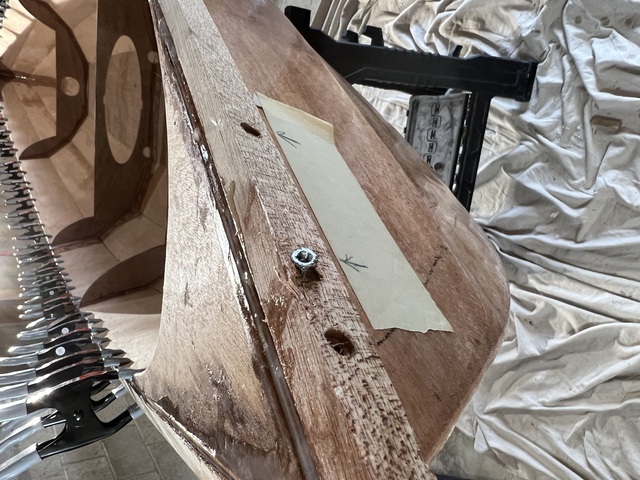
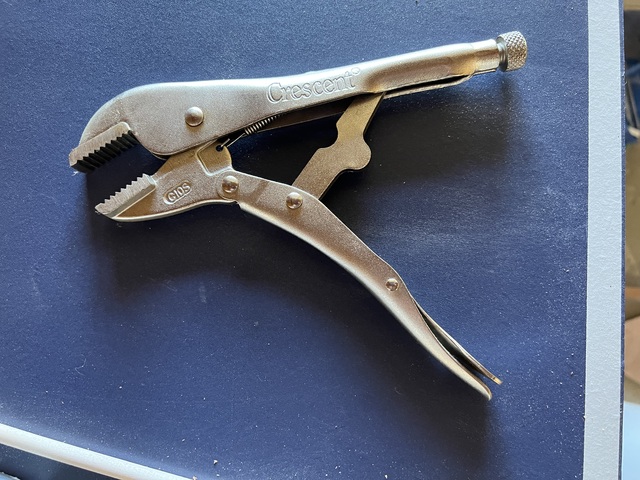
And we've been fixing screens and windows. A repairman came to the house today to work on the windows. He saw my boat project, and we discussed it a little. I asked if he knew how to remove a stripped screw, and sure enough, he had the right tool. As you can see above, the screw is protruding. I tried using pliers to remove it, but couldn't get them to grab on tightly enough. This guy had a vise grip which could grab on tightly enough, and that was that.
So even though the problem was fixed, it looks like a really handy
tool, so I bought one.
Inspecting yesterday's work, I noticed that at the bow and stern,
where I had problems with the screws, the rail wasn't tight against
the boat. I could actually see through the gaps.
So today I filled those gaps with epoxy, and added screws where needed. I'll come back next week to check and see whether I can move on to the second set of rails.

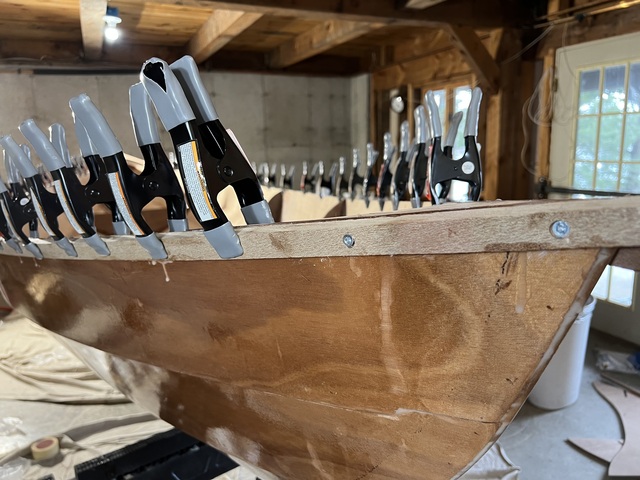
It's May 5. The epoxy has dried, so I removed the clamps, and here
it is. The boat with the first set of rails:
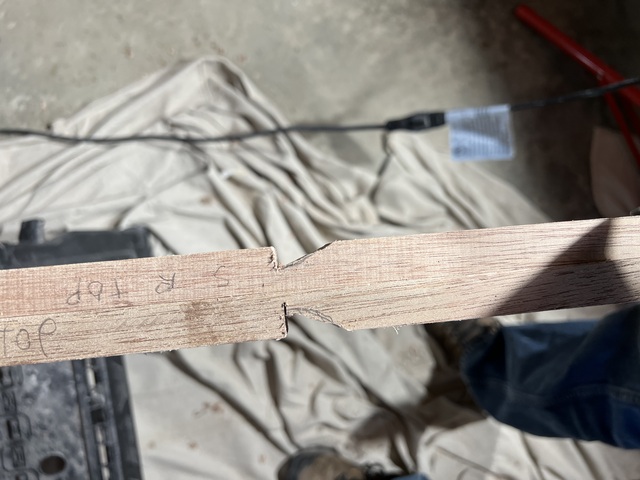
I clamped on the second set of rails, to prepare for installing
them. Following advice in the manual, and from the CLC forums, I
needed to cut a notch into each end of the outer rails, to create a
place for clamps to secure the ends of the rails during
installation. I used my favorite saw to do this, (the picture shows
the two rails clamped together. Easier to get things symmetric this
way.)
Now I try to be careful. I really do. But as regular readers of this blog know, my attempts to execute various tasks on this project often fail. This time, I tried to be careful to not saw off my left hand (the one not holding the saw). But that made the sawing pretty awkward. I was unable to both hold in place the rail that I was sawing, and to saw away from all body parts. Perhaps I could have used the vise, clamping it to the sawhorse. Next time. But this time, I reasoned as follows: the saw is already sawing into the wood, nowhere near the top end of the saw blade. There is no way for the saw to jump out and attack my hand holding the rail.
Well, of course there was a way, and just as I finished cutting the
notch into the last of the rail ends, the saw did in fact, somehow,
slip out and land on my left index finger.
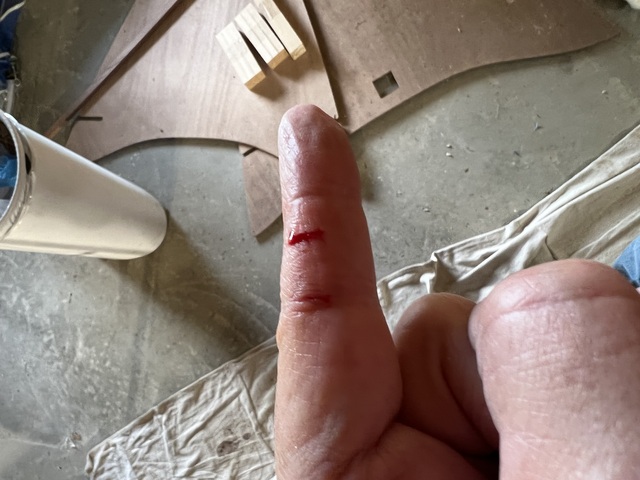
There was quite a bit more blood after this picture was taken. Not
enough to require the services of Mr. Wolf, but there was more
of my blood outside my body than I would have preferred.

I sealed up the screws and abandoned screw holes at the bow and stern with epoxy, and when that sets, I will install the second set of rails.
Oh yeah, I'm a pro at this by now. Sand the boat where the rails will attach, mix the epoxy (mustard consistency), apply to the boat, apply to the rails, clamp in place, screw in each end. And it all went pretty smoothly, and without further bloodshed.
Those notches, which I paid for in blood, were useless. The large clamps I had didn't fit around them, the larger clamps slid off, and finally the rails past the notches broke off. Just a fiasco. But between the other clamps, and my holding the rail end in place temporarily with my hand, I was able to get the screw holes drilled, and screws put in.
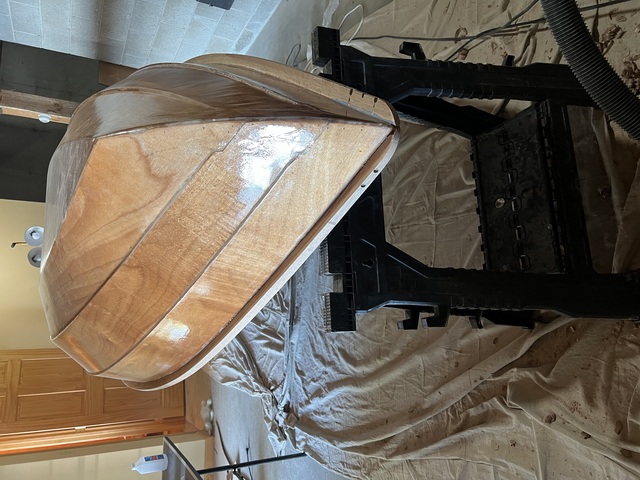
This picture is not a duplicate. It looks a lot like the picture
after installing the first set of rails, but there is indeed a
second set of rails present.
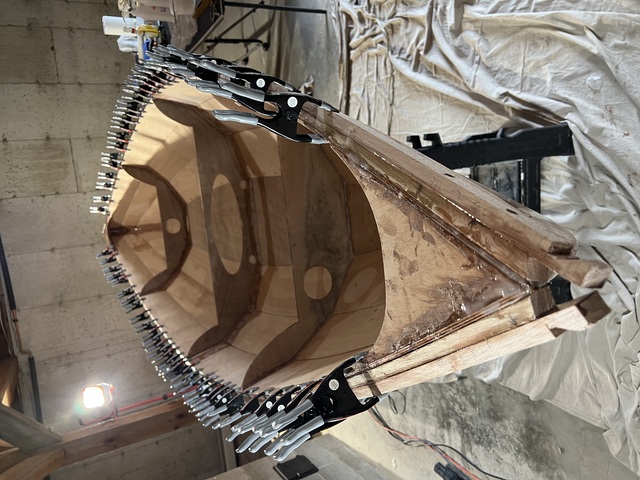
But it wasn't pretty. There is a lot of cleanup to be done.
As usual, I won't declare victory until I see how things are on my next visit. Epoxy runs, rails popping off, who knows what I'll find.
It's May 11. It's been a week since I installed the second set of rails. With some trepidation, I removed the clamps. It's like that moment in movies when the kidnapper removes the gag and handcuffs from his victim, and the question is whether the victim is going to scream or try to escape. In this case, I was wondering whether, with the clamps removed, the rails would violently spring off the boat. And nothing happened.
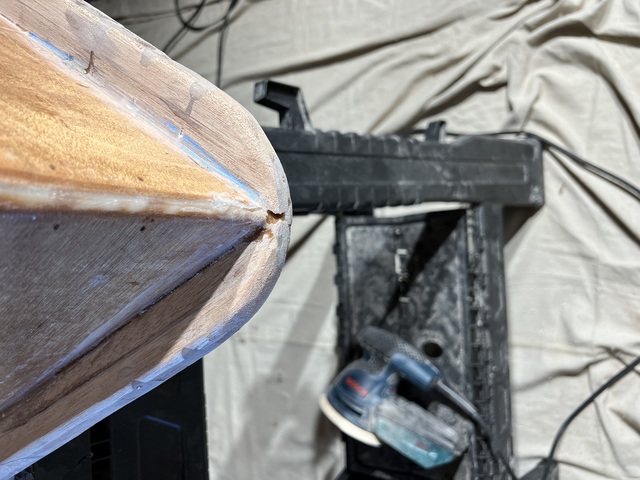
So moving on. There is epoxy all over the place. The ends of the rails need to trimmed and rounded. Remember the tapering? I tapered the first set of rails, but I was supposed to taper the second set after the rails were glued on. So that still has to be done. And then I've got to seal the screws and abandoned screw holes, sand everything down, and coat the rails with epoxy.
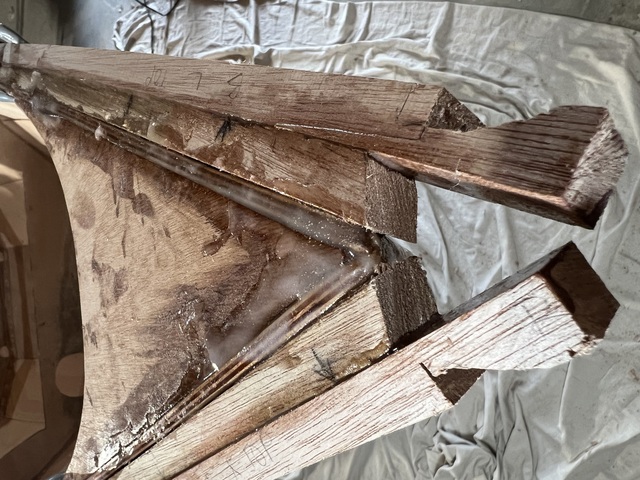
Here is the bow end of the boat before all the cleanup.
I trimmed and rounded the rails, sanded everything, and while the
signs of epoxy slop are everywhere, it's looking better. Here's the stern:
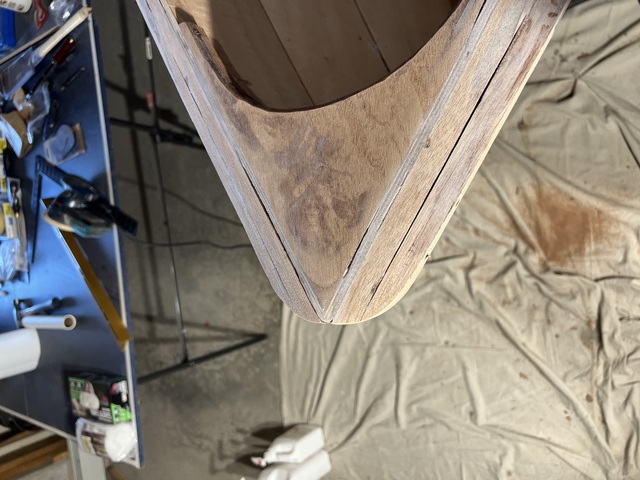
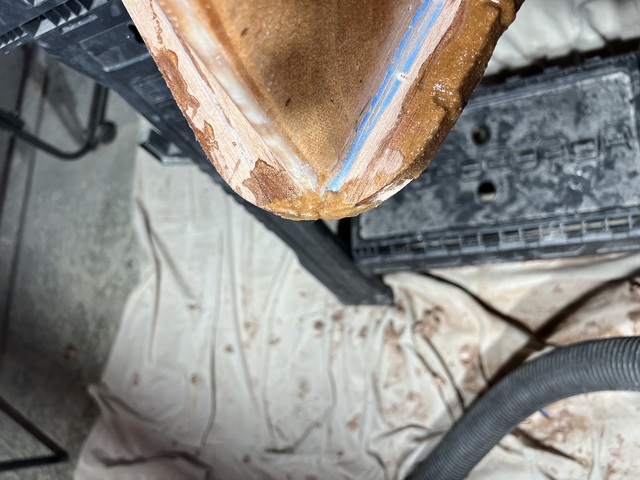
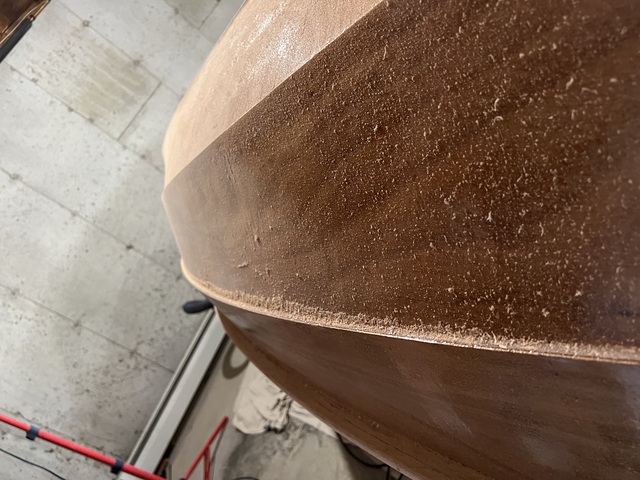
You can see that the tapering still needs to be done: the outer part
of the rail is thicker than the inner part:
Here's the bow:
I flipped the boat upside down to taper the outer part of the
rails. As before, the plane was sometimes working, sometimes not. And
also, the blade kept moving around. It finally occurred to me that the
screw holding the blade and plane together could be tightened!
Yes, that should have been obvious to me last time. Once I tightened that screw,
the plane worked perfectly and consistently, and I was able to taper the rails quickly.
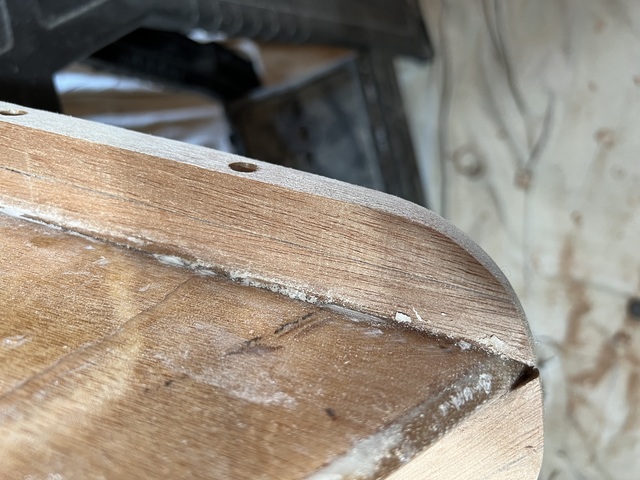
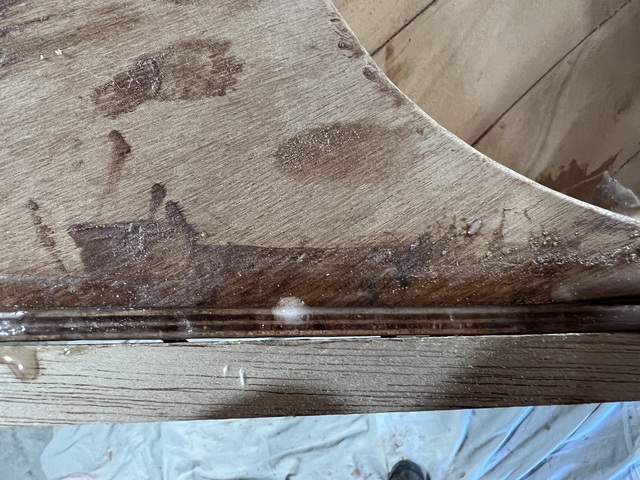
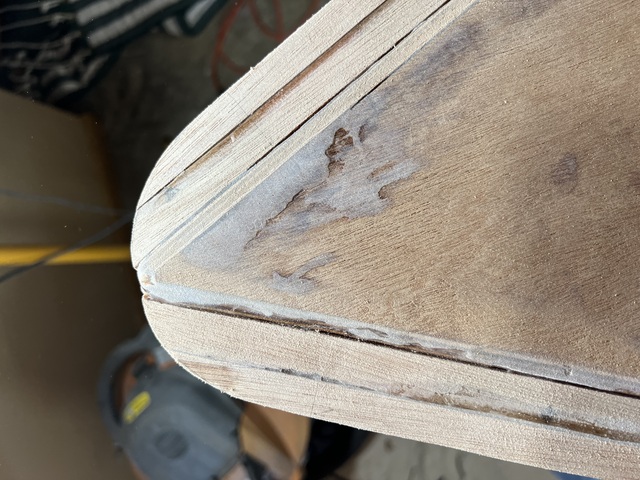
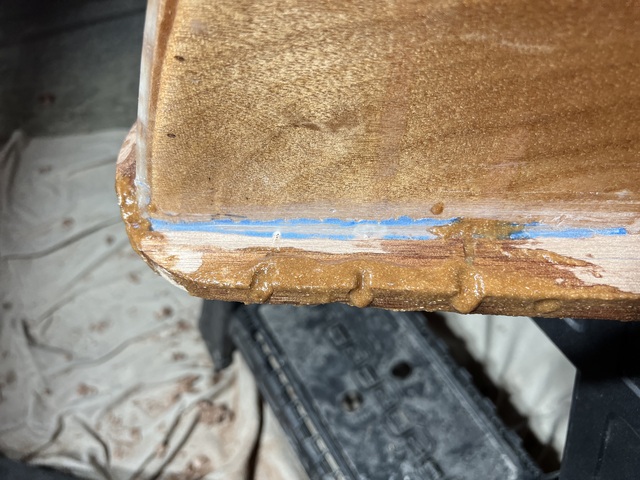
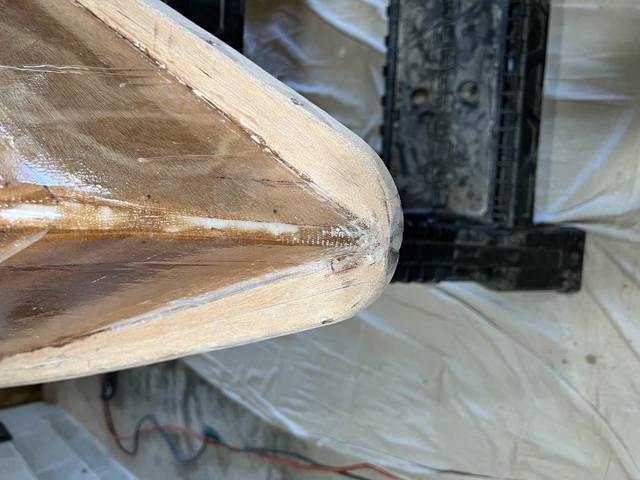
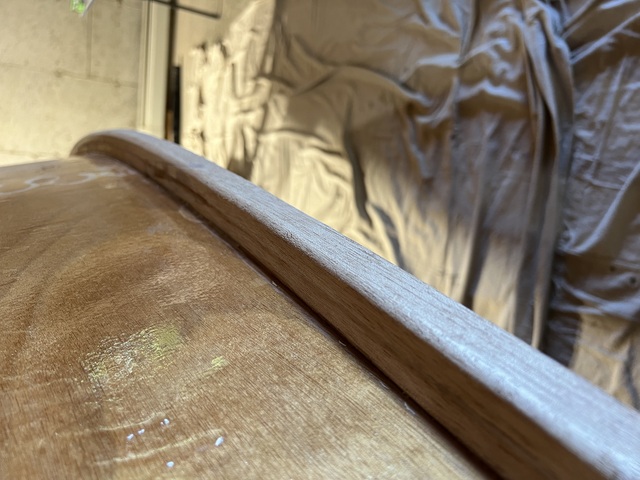
Look at that rail. Just look at it. You can actually see a thin
line running down the middle, because it is two separate rails, glued
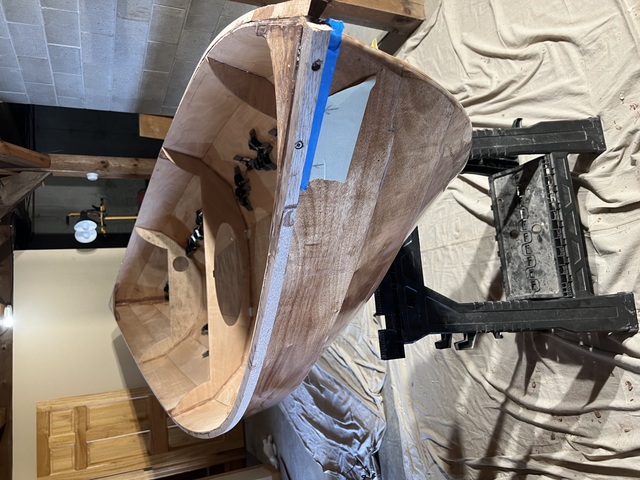
together. Declaring victory on this. And here we are:
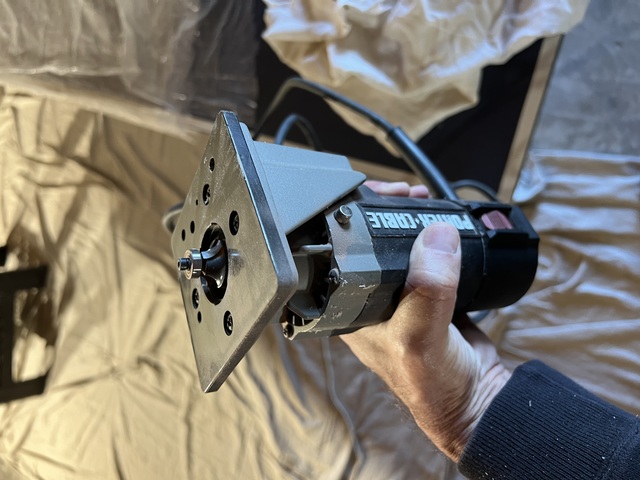
Tomorrow, I get to buy a router, to finish the edges of the rails. (That tool will also be useful later, when I need to open a slot in the bottom of the boat to accommodate the daggerbaord.)
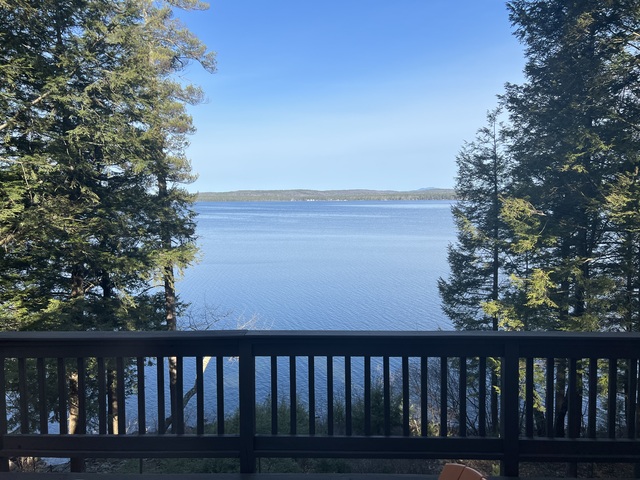
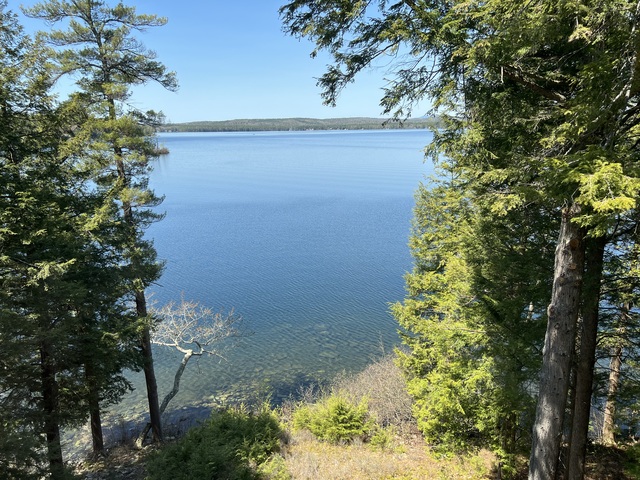
It's May 12, and it's a beautiful day in the neighborhood, (view
from the 3rd floor).
I was reluctant to do this next part. The rails were looking so neat yesterday. But part of finishing up the rails involves adding more epoxy to seal up various holes and accidental gouges, then more sanding. There's a lot of that in this project. Get something done, it looks great (more precisely, as good as I'm going to get it), but progress requires creating another mess.
So today's work was to apply the epoxy, combined with wood flour,
mustard consistency. I made it a bit thicker than normal because some
of the gaps are pretty big, and I wanted to minimize dripping. In
particular there are still pretty big gaps between the rails and the
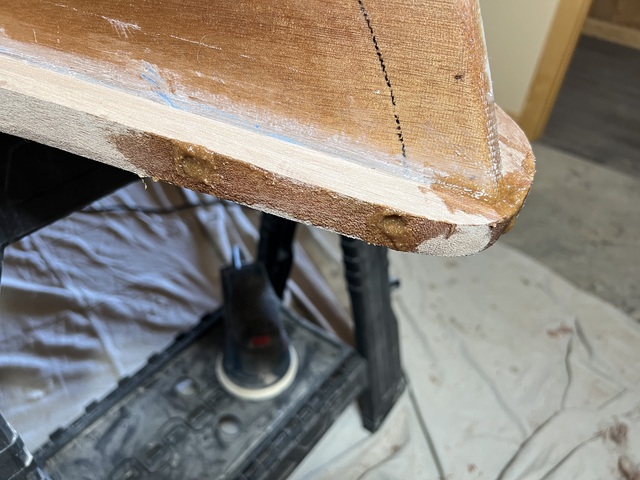
boat at the two ends. Here is the stern:
This really looks like a first pass. There are two gouges where the epoxy did drip, in spite of my efforts. (Those are the result of misdrilled holes. I forgot to allow for the fact that the rails were tapered there.)
The bow isn't quite so bad.
More next week.
It's May 18, and it is starting to get warmer here. Still a bit windy.
I sanded down the epoxy from last week, that I added to fix the mistakes I made installing the rails.
The bow and stern are starting to look better.
After that, I needed to round
the sharp edges of the rail. Mark came to the rescue again. My plan
was to buy a router for a couple of tasks, including rounding the rail
edges. I sent him questions about brands and features. He volunteered
to loan me what I needed from his extensive collection of
routers. For the rail edges, he sent me on my way with his smallest
router, and a collection of bits.
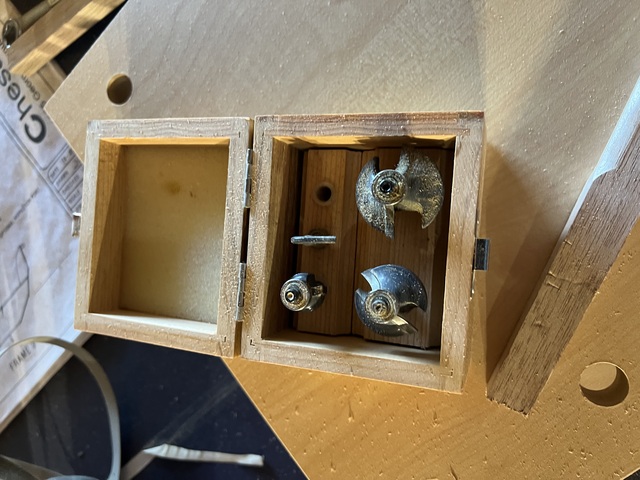
First some practice.
Between youtube videos, and Mark's instructions, rounding the edges
was quite easy.
There was a lot of sawdust.
Next there will be three rounds of epoxy on the rails, (sanding in between), first on the rail bottoms (currently facing up) and sides, and later, when I next flip the boat over, the tops. But the rails are done.