July—August 2023: Random Crap

The interior of the boat is done once I install some wood pieces to support the mast. After that, I need to work on the mast, spars (the boom and yard — other long sticks of wood that support the sail), rudder, daggerboard.

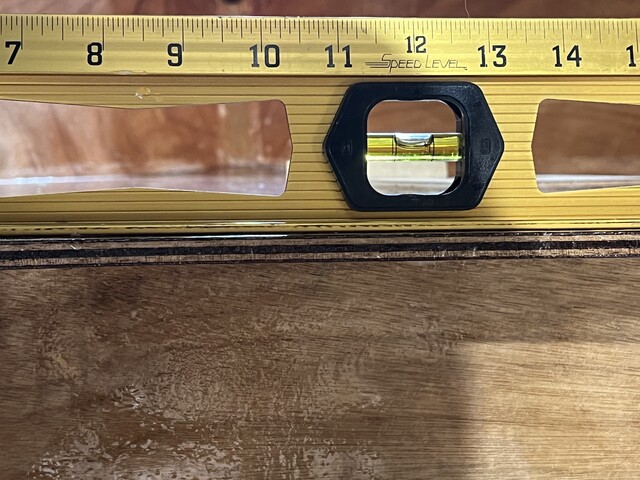
To begin, I wanted to ensure that the mast will actually be at right angles to the bottom panel and seat. So I used a level to make sure that the floor itself is level, and then I checked the horizontal surfaces of the boat, which is resting on the floor.


Looks good. Next, I temporarily installed some braces to make sure that the mast is at right angles to the seat.

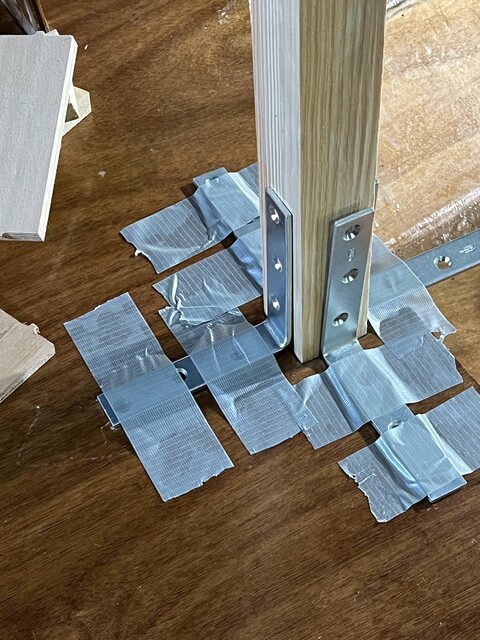
No, this is not the entire mast. No, the mast hasn't already snapped. Like the rails, the mast is shipped in two pieces, which will have to be epoxied together.


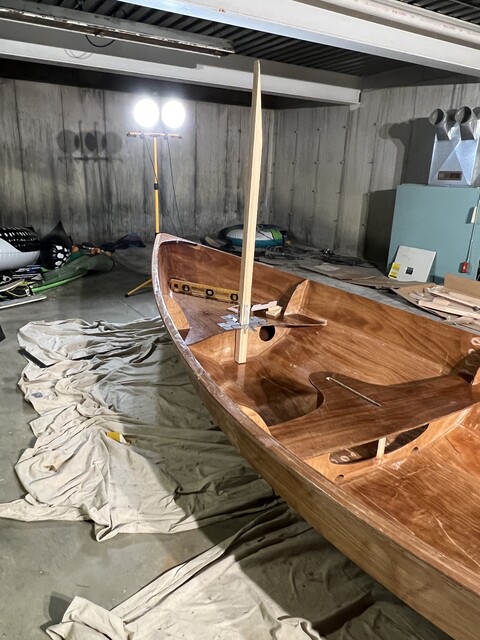
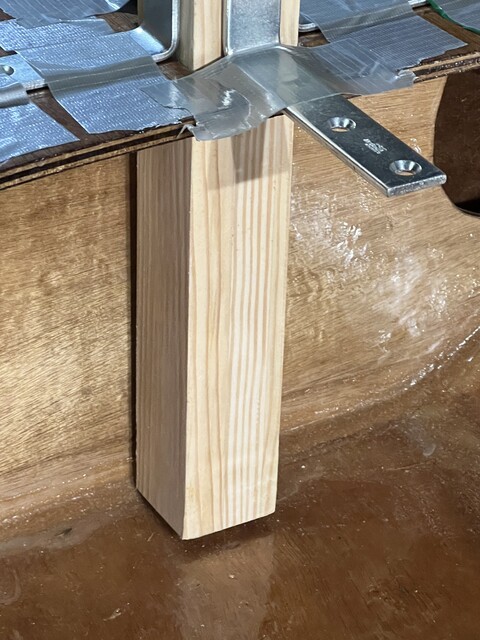
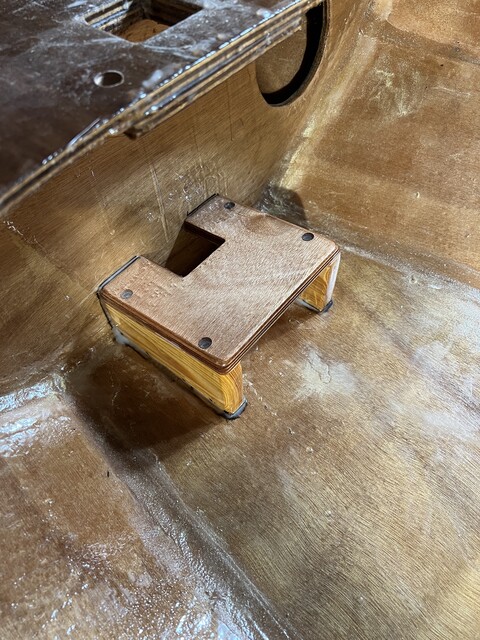
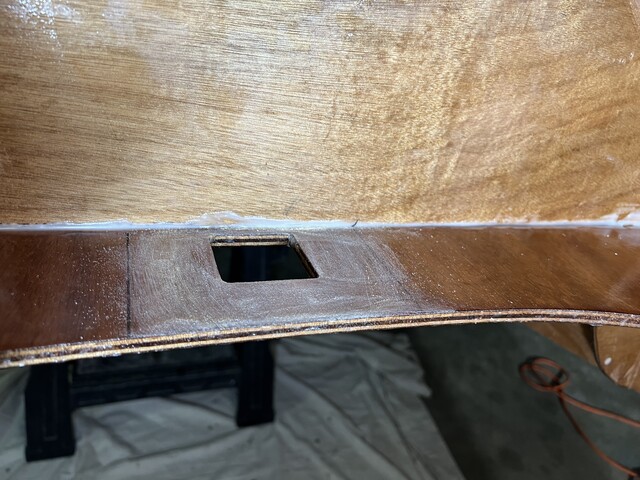
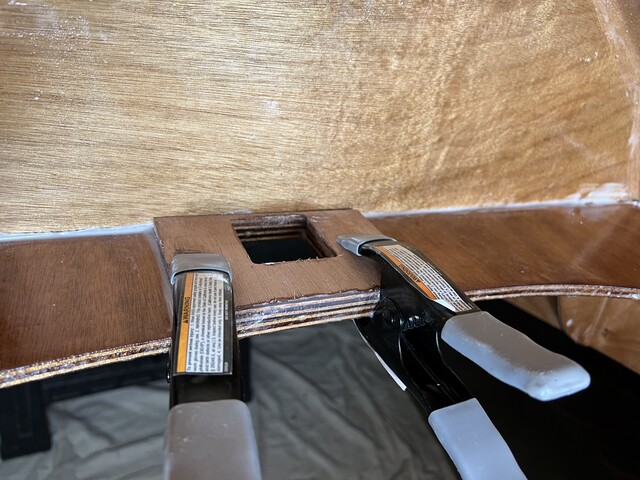
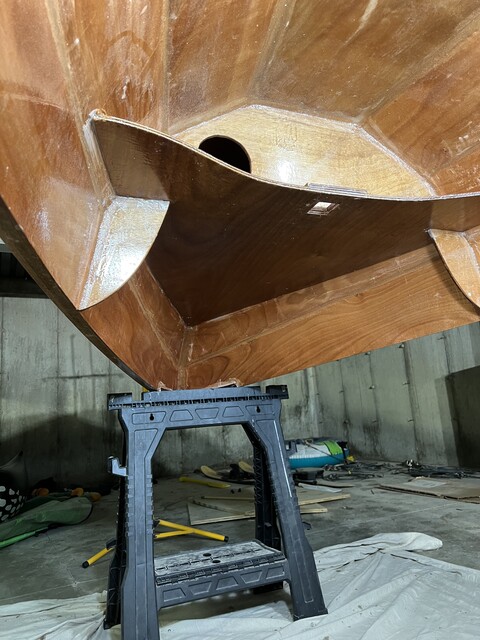
That was a dry run for later. For now, all that I needed to do was to install a mast partner, a reinforcements under the front seat, around the hole through which the mast will be inserted.

I turned the boat upside down,

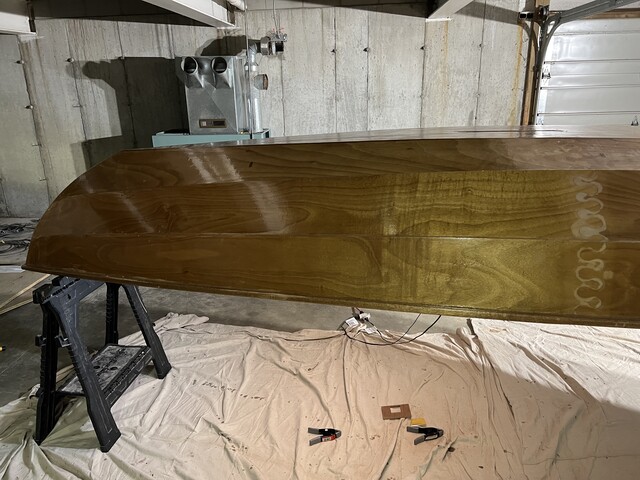
Installed some lights,

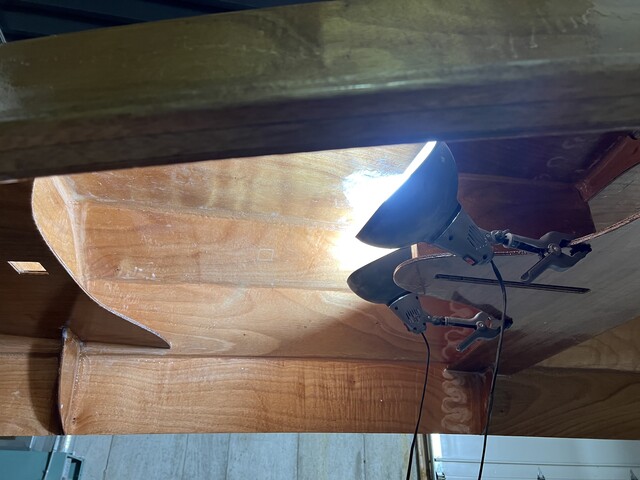
And installed the mast partner.
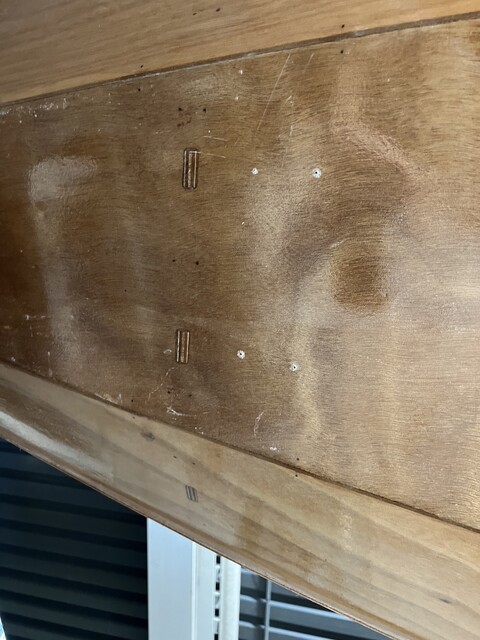
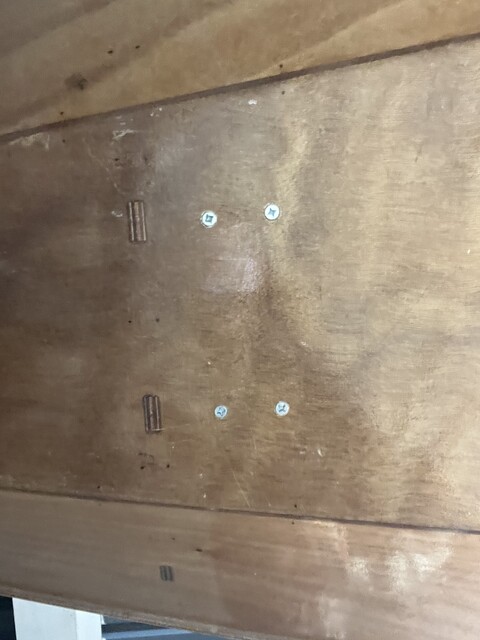


I'm getting too old for this

It's July 7 2023. To finish up the seats (yes, they are installed, but not quite done), I need to apply fillets. Alert readers already know what a fillet is, but for the rest of you, it's epoxy mixed with wood flour (to an organic — not Skippy — peanut butter consistency), applied at the seam where two pieces of wood come together. Installing the seats created more such seams, so more fillets are needed.

The boat is upside down, so I decided to apply the fillets to the underside of the seats. This requires me to work, and crawl around, on my knees, under the boat, for hours. This is not really the sort of thing you want to do at my age. Although, I did get an occasional break, to mix more organic peanut butter consistency epoxy.


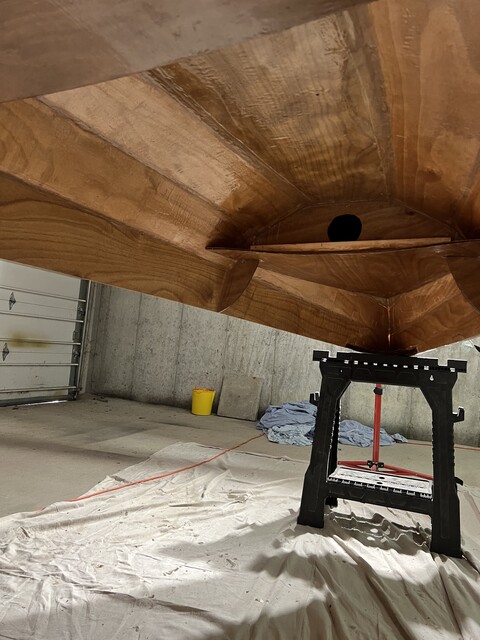
(I'm not sure why the boat looks so tilted and about to fall over, in that first picture. It's resting quite stably on the sawhorses.)

When the boat is flipped rightside up, I'll do the fillets for the seat tops, and then the seats are really done. I'm also assembling the mast step, and that should be pretty easy to install.

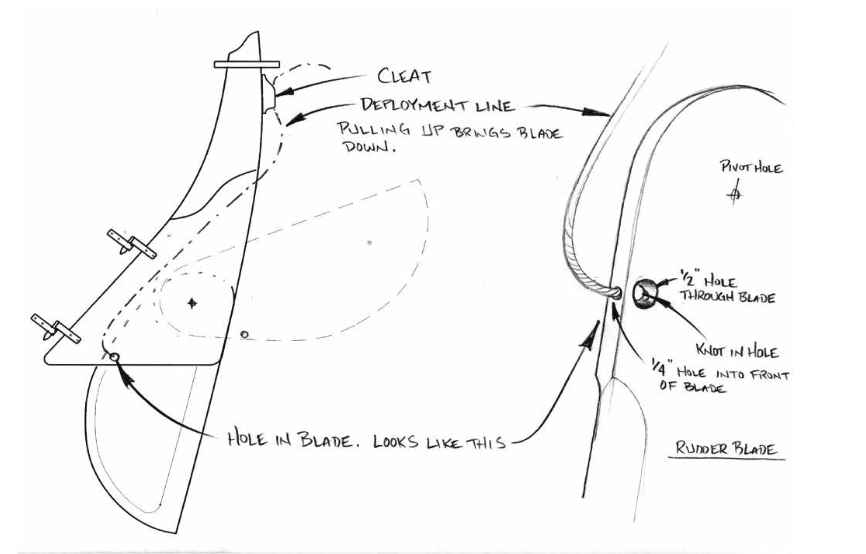
And then after that, I need to assemble the mast, boom, rudder, tiller, and attach these to the boat. So the end is in sight. I'm also starting to think ahead to other problems:
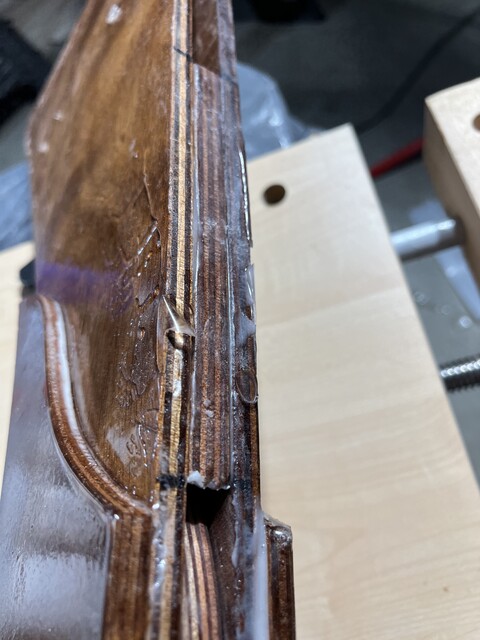
July 10, 2023: I'm not going to bore you with more pictures nearly identical to earlier pictures, which also differ in the tiniest ways from the pictures before that. More shaping of the mast step. More filleting of the seats. I also started laying out the parts for the daggerboard and rudder, and trying to understand how they all fit together. The only slightly exciting development is that the pre-cut rudder parts appear to differ slightly from what is in the manual. Longtime alert readers will recall that I had a 2.0 manual with 2.1 parts. But this time, the 2.0 and 2.1 manuals show eight rudder parts, while my kit has seven parts. The 2.1 addendum doesn't mention anything about the rudder at all. I suspect that CLC decided to merge two of those pieces. So, is it possible that I actually have a 2.1.x kit? Or 2.2? I've written to my buddy at CLC, Nicky, and will keep you posted on this developing story.

Setbacks

It's July 12, 2023. It was all going so well, and then it wasn't. I am indeed missing a part of the rudder. Nicky agreed to send it, and I managed to typo the zip code, so that will cause a delay. And then 
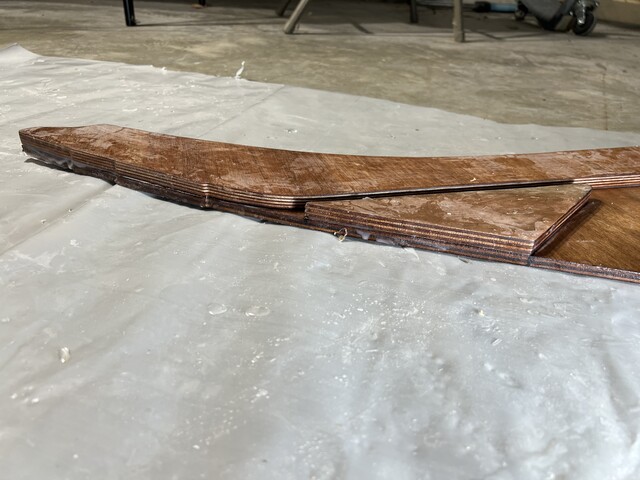
after I applied the latest coat of epoxy to the mast step, I set it down to dry on the canvas dropcloth. For a previous coat, I set the mast step to dry on a thin platic tarp, and that got stuck to the mast step. So I cleverly avoided the plastic, and put the mast step on the dropcloth, which binds much more tightly. And in attempting to remove the canvas, I broke one of the mast step sides.

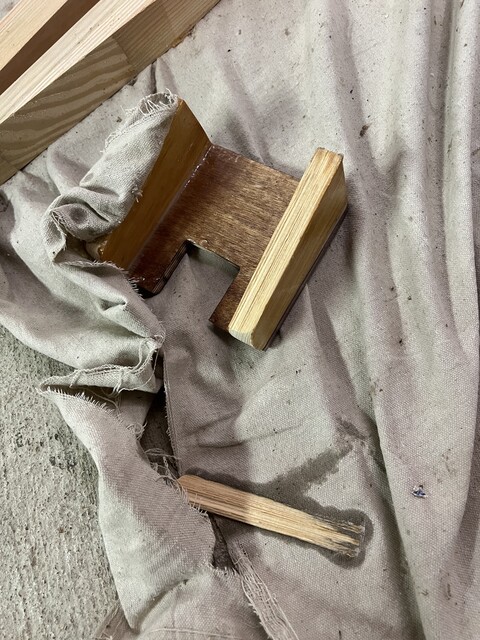
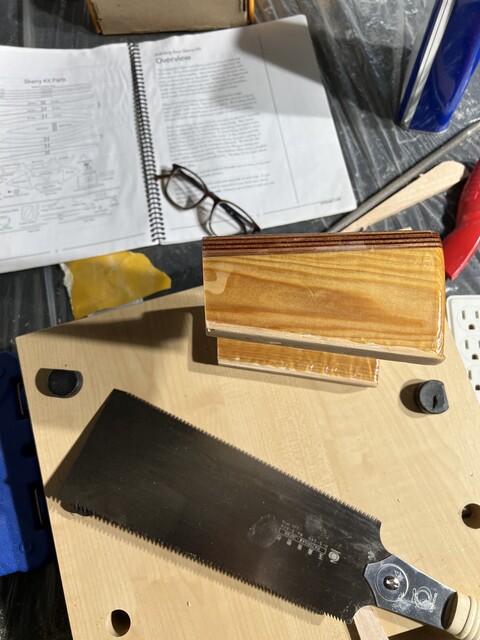
So I wrote to Nicky again, to ask about buying another set of mast step pieces. I could buy some wood, and cut the pieces myself, but knowing myself, that's a major and time-consuming project, and I don't have the tools to cut out the square.

Meanwhile, I epoxied the boom and yard. That's a small I-beam that the pieces are clamped to. The guy who built the house used material like that in a few places, so I just happened to have that I-beam sitting around.

I'm not assembling the mast yet. I'll need that short piece of mast to fit mast step 2.0.
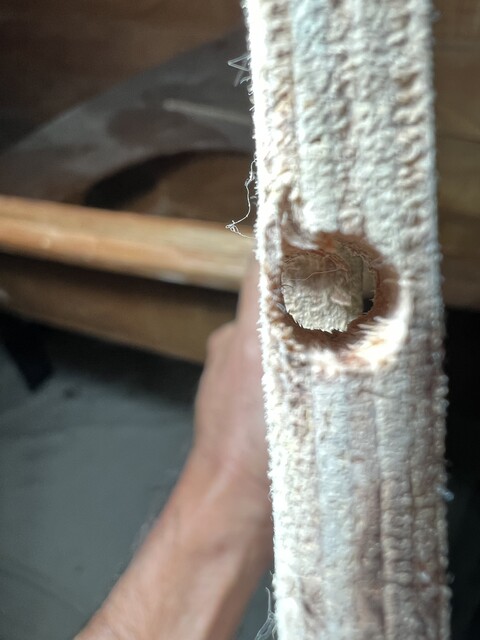
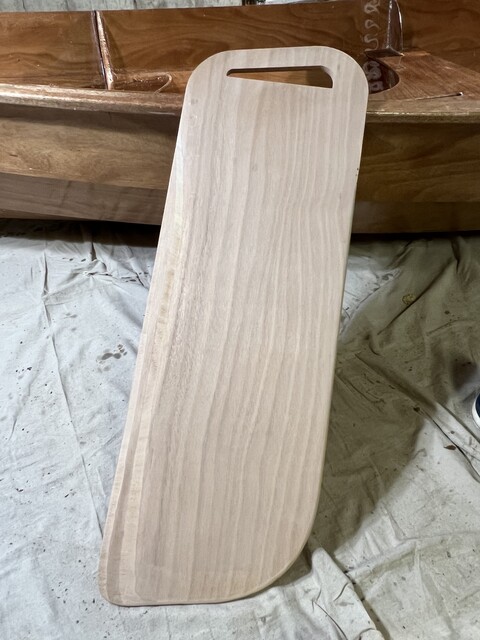
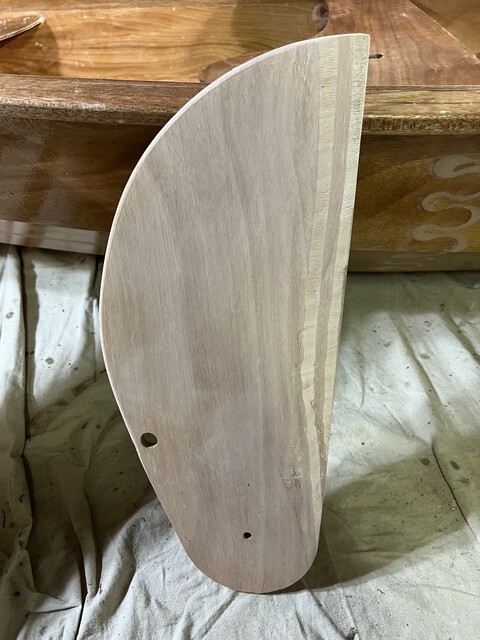
No Epoxy Day

It's July 13, 2023. While waiting for the replacement mast step to arrive, I worked on the daggerboard. It's a 1/2" thick piece of plywood.

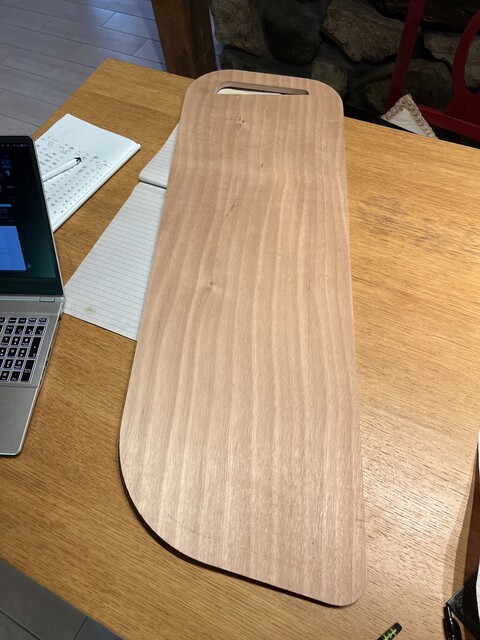
Shipped from CLC, the daggerboard is of uniform thickness, i.e., the cross section is a rectangle. To work as a daggerboard, minimizing drag, it needs to be shaped like an airfoil, an elongated teardrop. While the CLC forums are often helpful and reassuring, sometimes it's like being at a bar, where everyone is friendly and welcoming, but you realize, oh, these are PhD mathematicians, and you are incapable of understanding much of what they are saying. So the advice on how to shape the daggerboard was both thorough and useless to me. It involved tools I've never seen before, operated with a very high level of skill. For example, there's this two-handled planing contraption, called a "spokeshave". And to use it properly, you need to move it in a perfectly straight line across the length of the daggerboard, at just the right position, at just the right angle, many times, with different positions and angles each time.

Knowing my limitations, I looked for a simpler approach. Most people seem to do what is documented poorly in the Skerry manual: approximate the airfoil shape by rounding the leading edge, and tapering the trailing edge. I talked to Nicky some more, she sent me useful diagrams from the manual for a different boat, and she also provided advice on tools. (Belt sander: too aggressive, which is just as well since I don't have one.)

Putting all my information together, I started by creating a template showing me where to operate on each side of the daggerboard, and making sure I would treat the two sides symmetrically.


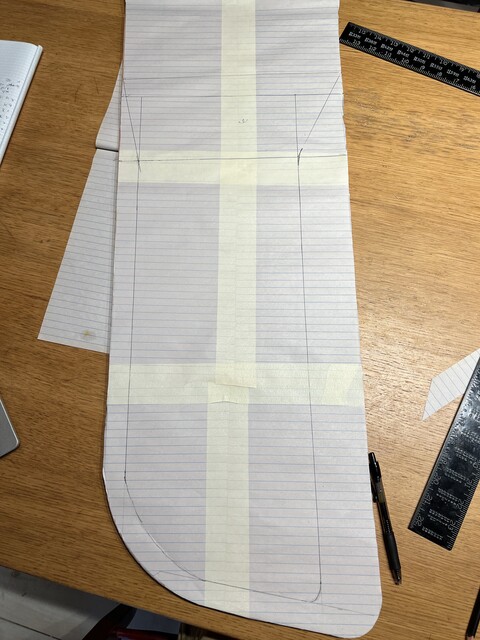
This was time-consuming, and turned out to be completely useless.

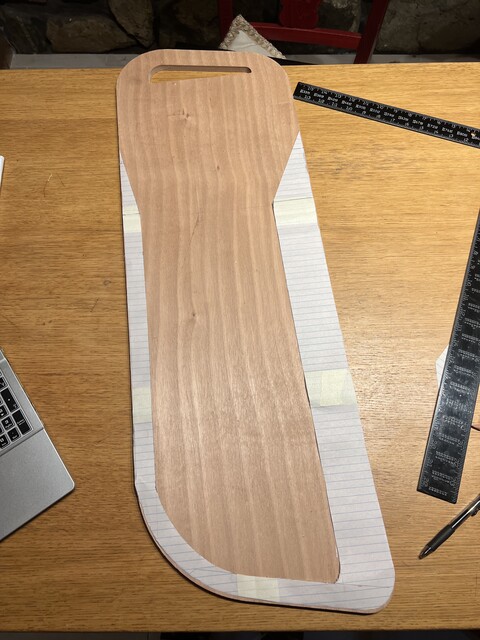
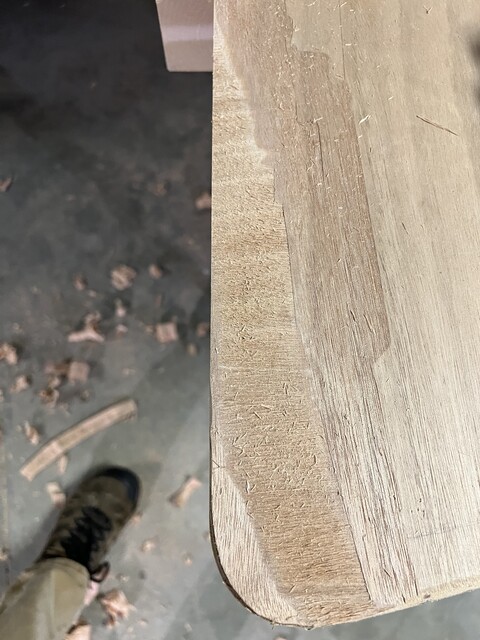
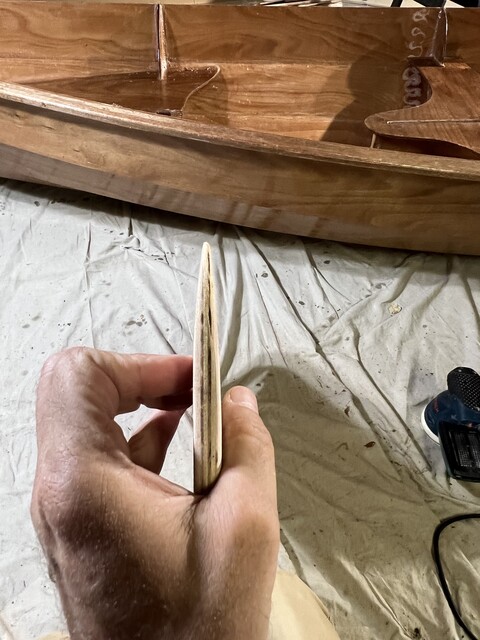
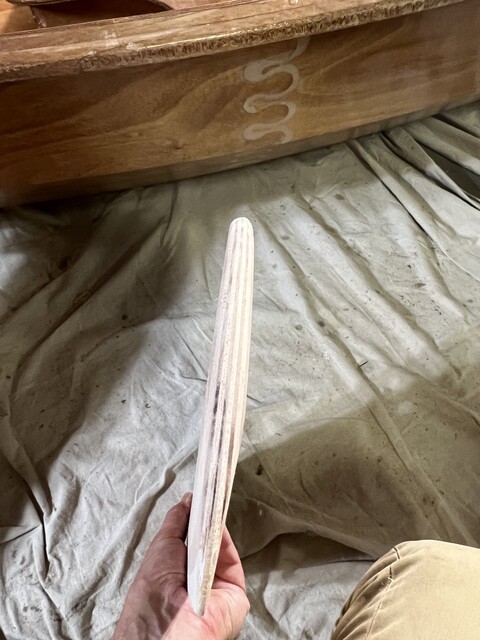
First I used a router with a 1/4" roundover bit to round the leading and bottom edges.

To taper the trailing edge, I first marked the middle layer of plywood, to avoid sanding too much on either side.

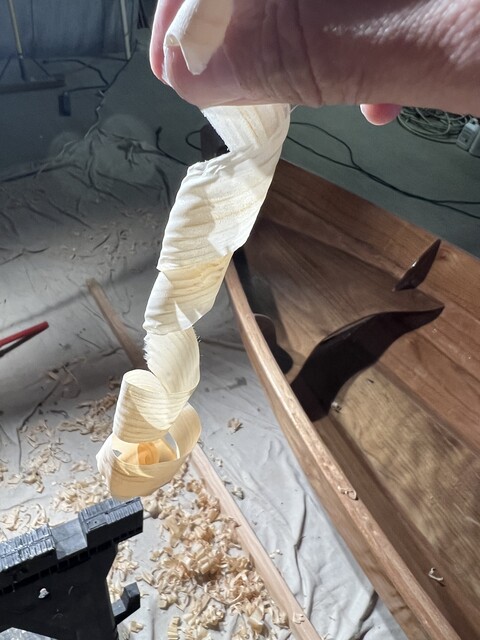
My choice was to do the tapering using the sander or the plane. I thought it would be too difficult to make the surface completely level where I was tapering, so I used the plane. As before, I found the plane fiddly and I had to keep stopping to blow out and otherwise remove accumulated wood shavings. Scenes from my afternoon:

Getting used to the plane again.

Approaching the midline on one side.

One nice thing about plywood is that the different layers look different, and that provides useful visual feedback on what's been done, and where work is still needed.

You can't really see that shaping from this view.

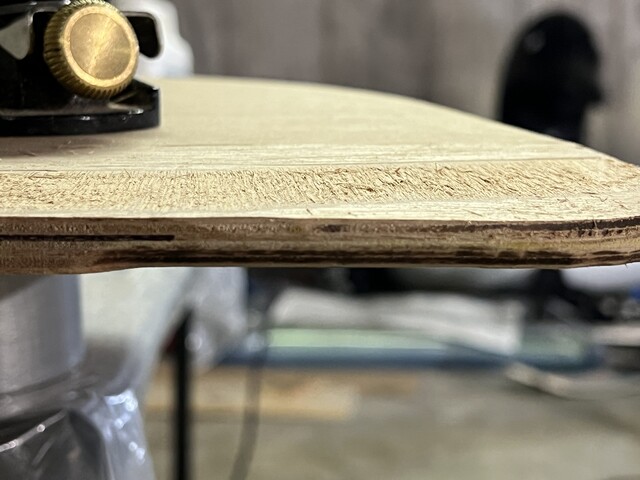
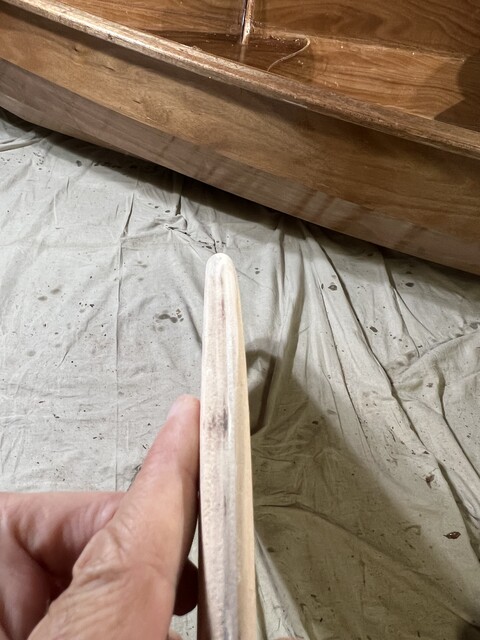
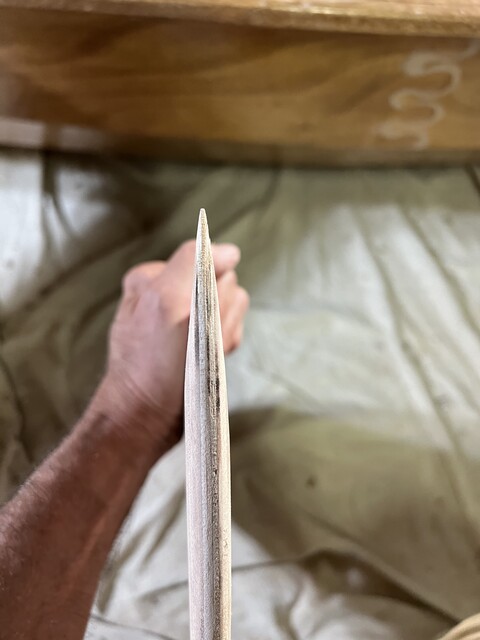
So here are the edges, trailing:

And leading:

No epoxy today!

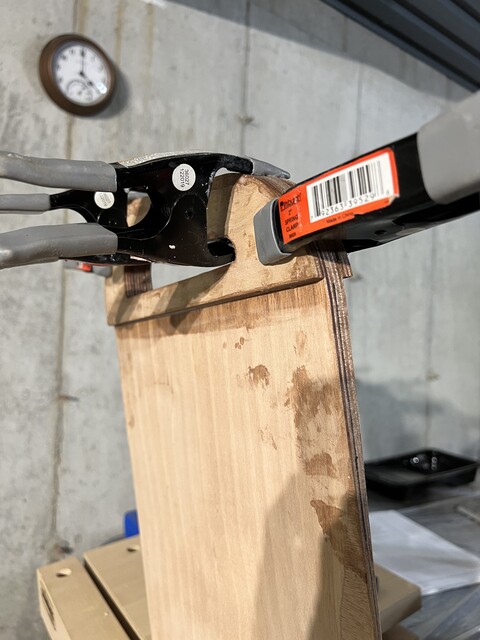
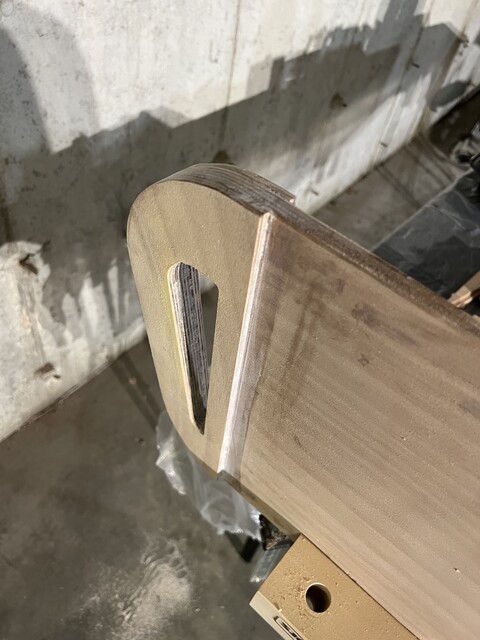
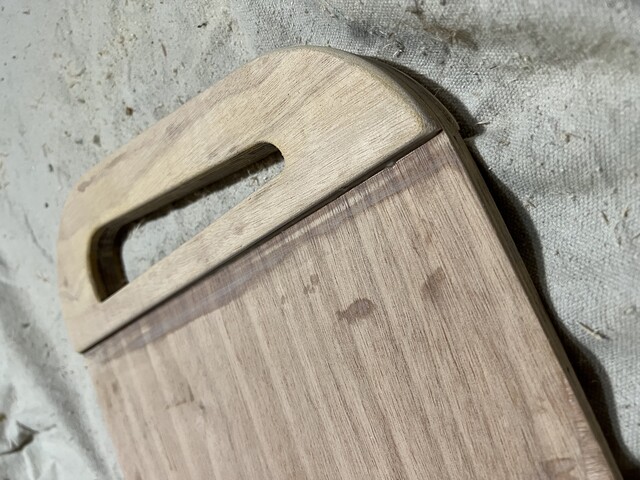
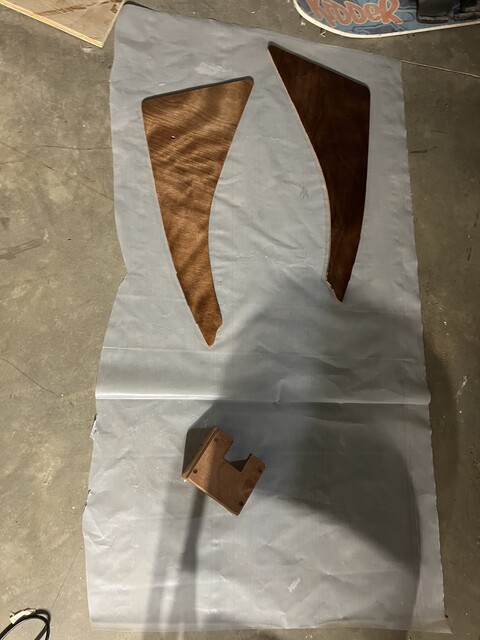
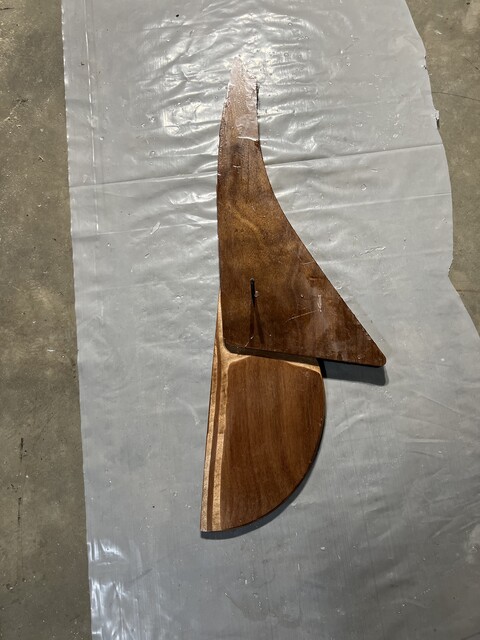
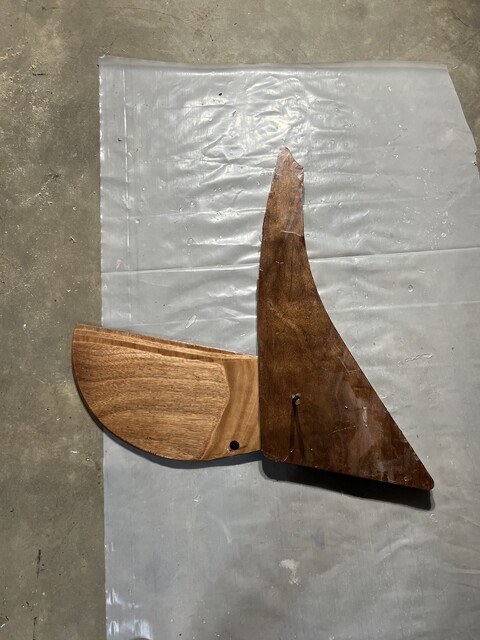
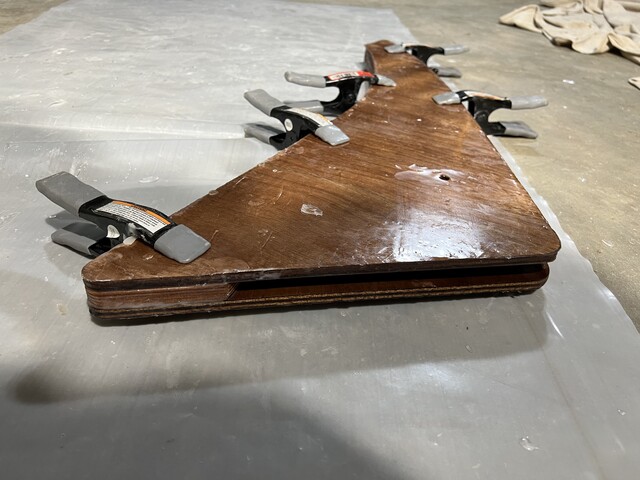
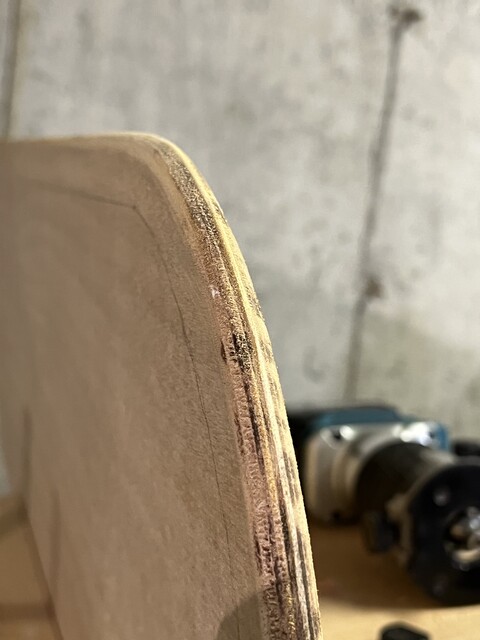
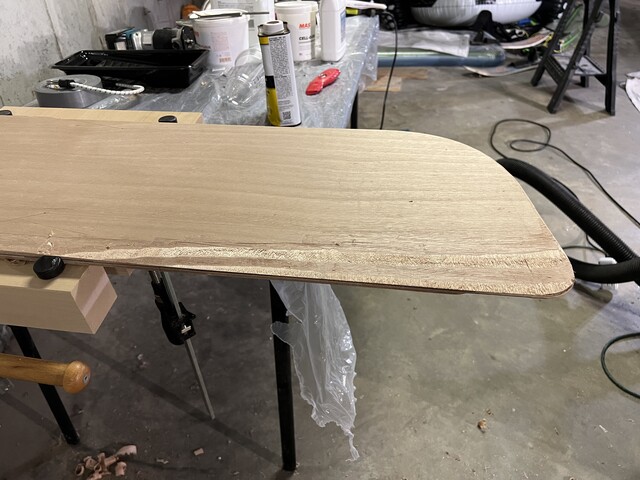
July 14, 2023: And the rudder is done:


My new enemy

It's July 16, 2023. I'm still waiting for the new mast step to 
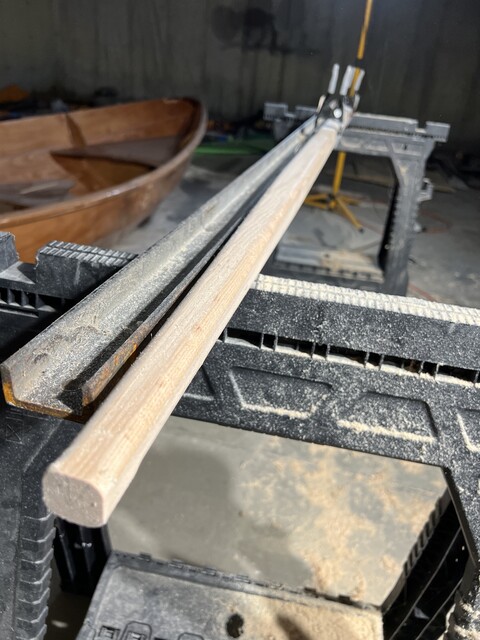
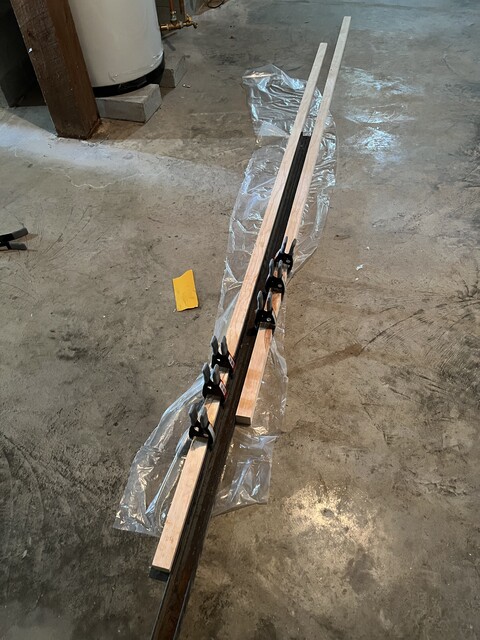
arrive (should be tomorrow). So I decided to make progress on the boom and yard. Those are identical 10' lengths of wood, 1 1/2" square. I need to taper each one, 20" from each end, to a 1" square. One face, which will be the top side, is supposed to be left alone, so I'll take 1/4" off each side, and 1/2" off the bottom. I marked these dimensions on one end and drew lines to 
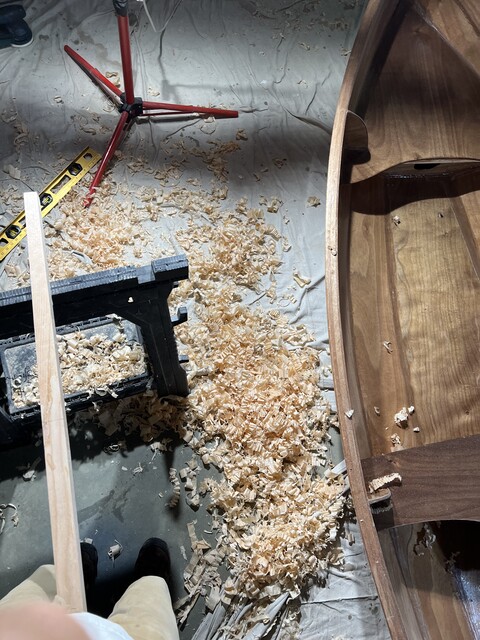
guide my work. (This is midway through tapering the bottom.)

The block plane is my new enemy. I need to do a lot more planing here, compared to the daggerboard and rudder. I spend a lot of time adjusting the blade height (too low and nothing gets removed, too much and I gouge the wood and get stuck); clearing out shavings; and just figuring out how to apply this taper. I managed to get it done, and the taper looks pretty uniform, but it wasn't pretty. So after getting this part done, I took a break and reviewed youtube videos. This revealed one weird trick that made a lot of difference: orient the plane at an angle.

After my break, I tried that, and it helped a lot. But also, I just seemed to need much less time to adjust the blade height correctly. I think probably that the sides of the wood presented a different grain compared to the bottom. I'll see how it goes when I work on the other three (ugh!) tapers.

My mental model of a plane was that it removes a very thin, but uniformly thick strip of wood. I formed the taper by planing more where more wood needed to be removed, less at the other end. But there is a lot of variability. The strip that you remove can vary in thickness depending, I guess, on pressure, the angle with which pressure is applied, and small changes in the angle between the blade and the wood. It can be slightly tilted at one edge of the wood. And because the wood is wider than the plane, another variable is the depth across the wood. Anyway, of the four boom and yard ends I need to taper, one is completed.

My new pal

It's July 24, 2023. Julia is visiting for a week, and I'm sad to say that the boat will not be done while she is here. She guilted me into agreeing to get the boat in the water during her visit, and I really tried. I spent a lot of time working on the boat in May and June, a much more concentrated effort than in the previous four (!) years. But it just won't happen. I still think I can finish the boat this summer, but it will be after she leaves.

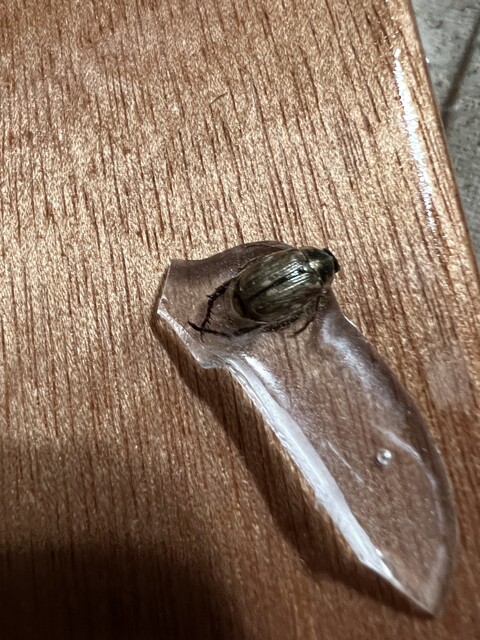
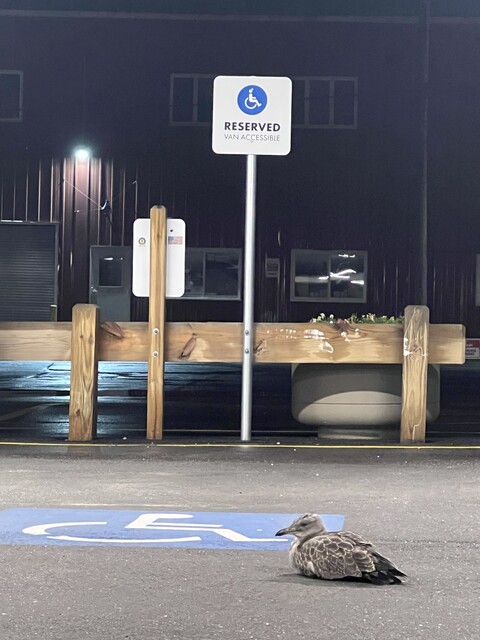
Just before Julia arrived, Hannah and I went to dinner in Portland. On the way back to the car, this happened.

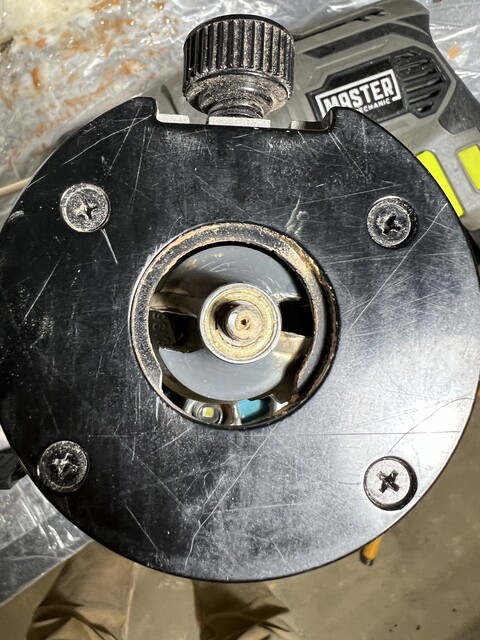
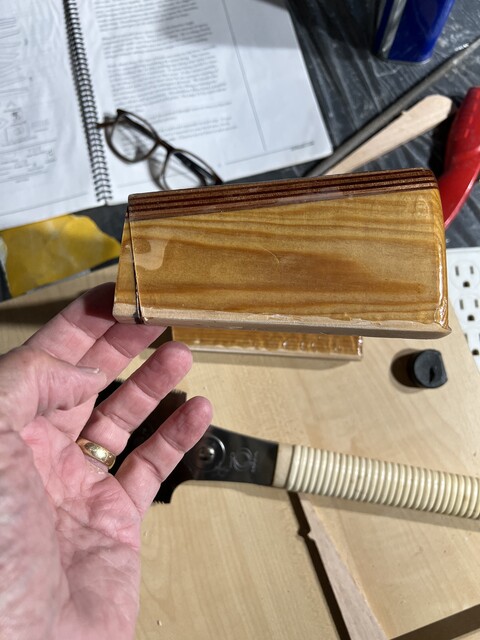
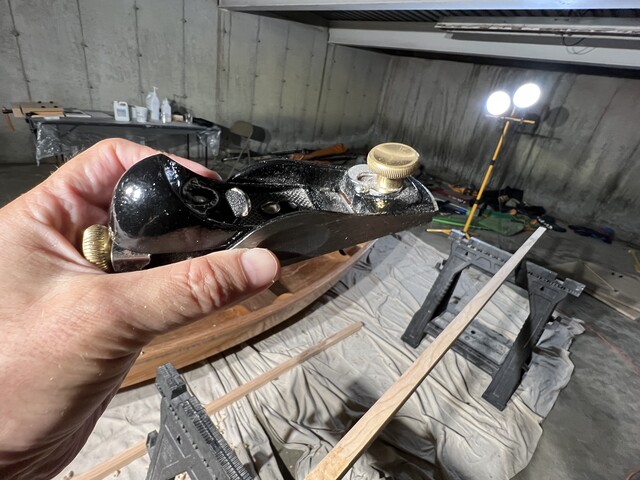
After I finished planing last time, I thought that it would be a good idea to sharpen the blade. So I looked at videos, got out my sharpening tool, and destroyed the blade. After that, the plane didn't work at all.

I went to Rockler, had a long therapy session with them, and left poorer, but with a new plane and sharpening tools.

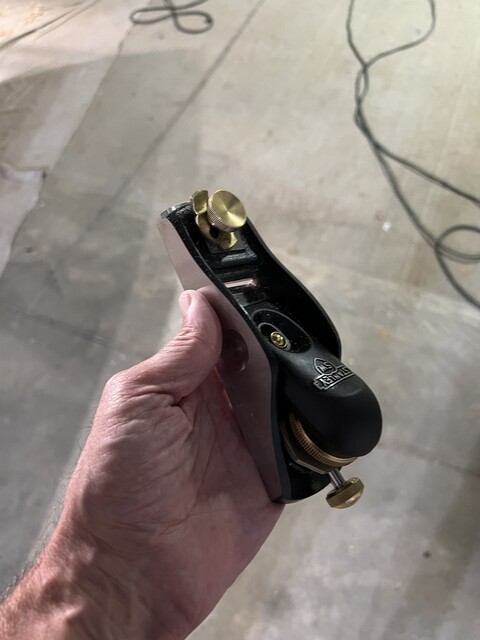
They confirmed what I heard in one of the videos I saw, the bottom-of-the-line Stanley plane that I had been using is indeed "junk". The guy at Rockler brought out a new plane, also by Stanley, but about triple the cost. It took him about 5 minutes to get it working. He then instructed me to go home, take it apart, clean everything with turpentine, put it back together, and it would be fine, just fine.

This filled me with trepidation. If he took five minutes to get the plane working right out of the box, what kind of journey was I in for, taking the plane apart and putting it back together? But it was, in fact, just fine. I took it apart, put it back together, and it just worked. Behold:

With my new favorite tool, I quickly finished planing the spars.

I now have a deeper understanding of what happened. My junky bottom-of-the-line Stanley plane was gaslighting me. I would loosen the top thingie, turn the screw a couple of full turns, which should cause the blade to poke out a lot more. Nothing, the plane still didn't work. Or sometimes I would tighten the screw just slightly, and all of a sudden it started working. Then it would stop working. It kept clogging.

This new plane just works! The controls work exactly as they should. Retract the blade a little, and in fact the blade retracts a little. If I'm shaving off too little, then I extend the blade a little, and it's just right. It keeps working. It doesn't clog. Long, hair-thin, perfect strips of wood just come off.

So with the spars tapered, my next task was to round the corners along each spar. Easy, use Mark's router with a 3/8" roundover bit. But the hole in the router through which the bit protrudes is too small for that bit.

Mark tells me to use the blade itself to widen the hole. In other words, just let it rip, having the blade, rotating at high speed, collide with the edges of the too-small hole, and in theory, that will widen the hole. As opposed to, in my imagination, shattering that piece of plastic and sending shards into my boat and into me. I will try this, clad in thick work gloves and safety glasses.

Progress on a few fronts

It's July 27, 2023. Things are back on track! Not that I'll get the boat done while Julia is here, but I'm making progress again.

First, I've been working on the daggerboard. I epoxied on the "cheeks".

Usually, when I glue one flat part to another, the parts slide around in spite of my clamps and best efforts. Not today, Satan. I was fanatical about adjusting everything to line up, applying lots of clamps, and then bashing things into place, while clamped, with a hammer. Voila.

I finished this part by planing and sanding the sharp edges.

Second, I routed the spars. I did try what Mark suggested, about modifying the router to accommodate the 3/8" roundover bit. I suited up (glasses, leather work gloves), set up the router, and slowly lowered the bit into the offending piece of plastic. That worked out just like Mark said it would. It neatly sliced off a thin layer of the plastic, and I was then able to work on the spars.

Third, and finally, I epoxied the rudder cheeks.

I suspect that CLC Support is finding me to be a burden. I call with many questions based on my very close, neurotic, terrified reading of the manual. This time, the issue is constructing the rudder casing. The manual wi=ould have me simultaneously using various means to clean out epoxy squeezed out by clamps, while the interior of the case is sopping wet with epoxy. That makes no sense. I left voicemail a few times. I'm beginning to think they are screening my calls, and that while they debate who has to talk to me this time, darn the luck, the call goes to voicemail. In any case, I finally got through, and Nicky was helpful as usual. Basically, just epoxy the cheeks and let them dry, then assemble the case. Much simpler, and not remotely similar to what's described in the manual.

More of the same

It's July 31, 2023. I have been working on the boat, but there isn't anything interesting to report. Just epoxying parts getting ready for the assembly of the rudder case. That said, there was one satisfying development.

This summer, we are inundated by Japanese Beetles. I don't remember seeing these guys in past summers here. They are about 1/4" in diameter, gold/brown, harmless, dumb, easy to kill. But so irritating. They like buzzing us, and they aim for hair. We're often picking a few of them out of Hannah's long thick hair. I hate these creatures. So it was very satisfying to find one of them encased in epoxy that dripped off the mast step.

Mast step 2.0 installed

Alert readers will recall that I managed to destroy the mast step, after I coated it with epoxy and set it down on my canvas tarp. This created a permanent canvas/mast step hybrid that is useless. While attempting to de-canvas the mast step, I ruined it. So I bought another one from CLC, put it together, and epoxied it. Today is the day that I'm going to install it.

Except that as I tried to fit the mast step into place, and failed to get it to fit, I started to realize that I may have assembled the mast step incorrectly. I think that I glued the top of the mast step to the wrong edge of the side pieces, because it seemed to fit the boat much better upside down. This realization spread across my mind slowly, and it was quite an unpleasant sensation. I was feeling extremely dumb. This is a "you had one job" sort of thing. There are two ways to put the three pieces of the mast step together, and in spite of having it done correctly once, I failed the second time. It was looking like mast step 3.0 would be required.

But I realized that slicing off a triangle from each edge of the mast step might produce something that fits into place, and would still support the mast. With nothing to lose, I figured out how much to remove, and sawed it off.


It seems to work! So onward.

The mast step will be both epoxied in place and held with screws driven through the bottom of the boat. As usual, the procedure is to drill pilot holes from inside the boat, and then use those marks to drive the screws from the outside. (Please note my casual use of "as usual" — I'm becoming such a pro.) However, I can't drill the pilot holes because the seat that I recently installed blocks the drill.

That's a bug in the manual. I wrote to CLC about it. Instead of drilling, I used a hammer and nail to create the pilot holes.

Julia has flown to Madison WI for work, so there are three of us in the house now, Audrey, Hannah, and me. I needed an assistant to hold the mast step in place while I drilled the holes from below, and then put in the screws later. Audrey is just too short, so Hannah assisted. She is 5'8", and while you can't tell from this picture, she gets another couple of inches from the heels on her shoes.

Pilot holes drilled:

Mast step 2.0 installed!


Another small setback

It's August 4, 2023. Pretty boring lately, just epoxying and sanding pieces of the rudder case. A couple more days of this and it will be time to assemble the rudder case.

I'm 66 years old, in fact, exactly 66.5 today. I know how my mind works by now. The way it works is to obsess about trivial things. If a miniscule concern crosses my mind for a few seconds, I can't let go of it. I keep going back to it. It keeps me up at night. Today's irritant is the hole that I drilled in the back of the rudder. The rudder is designed to rotate up and down in it's case, so that it can descend below the bottom of the boat into the water, and fold up when out of the water. Here's the picture from the Skerry manual:

A line passes through the small hole in the back of the rudder, and then there's a knot inside the larger hole that goes through the rudder. The line will control whether the rudder is up or down. Well, I drilled the little hole off center, so the remaining layer of plywood on one side is very thin.

It finally got to me. I wrote to the forums, and Mummichog replied that yes, that design is quite delicate, and his broke, even with a correctly positioned hole. So I'm going to fix it. I filled the hole with epoxy/wood flour. I will re-drill the hole, hopefully centered this time, and then reinforce with a little fiberglass. This may require that I sand down the sides of the rudder case (the "rudder cheeks") to accommodate the slighly thicker rudder, and of course, I've just epoxied those, so if I have to sand them, there's another three days of epoxying right there. You see? You see why my schedule keeps slipping? Little crap like this. Next summer for sure.

August 6, 2023: I filled the hole, and drilled it as carefully as I could. First I drove a thin nail, right in the center. Then I drilled with a very narrow bit. Then a wider bit. Then the 1/4" bit. And you know what? It's still off center, on the other side. Maybe not as bad as before, but still off center.

So I'm just going to leave it, and reinforce it. I epoxied on some fiberglass today. I'll probably add a couple of layers of epoxy/silica. And I'll just sand down the rudder case as necessary.

Assembling the rudder case

It's August 17, 2023. I haven't been slacking off, but there hasn't been much to write about. It's been just a few days of sanding and then epoxying rudder parts. Alert readers will recall that there are seven rudder pieces. There's the rudder itself. There are the "cheeks", two large pieces that form most of the structure holding the rudder. There are two centerpieces, which separate the cheeks, and form a guide for a line that will operate the rudder. And finally there are two "doublers", which just get glued to the outside top of the cheeks.

All the epoxying of these parts is done, and it's time to assemble them.

When everything is assmbled, it looks like this (minus the doublers).

The rudder rotates out of the way, which is convenient when the boat is not in the water. A line (rope) passing through the interior attaches to the rear of the rudder to pull it up and let it down.

For each part of the boat's construction, the manual guides readers through steps. Step 5 of the rudder assembly is just a goddamned mess. It's four paragraphs long, which is far longer than other steps. I've noted problems with this step before, with confused and nonsensical instructions about how and when to epoxy the various parts. I worked that one out with Nicky's help.

But there's another problem. Here is how the parts fit together, (with one cheek removed):

The centerpieces are the long boomerang-shaped piece on the right, and a small triangular piece to its left. The edges of those centerpieces must align with the edges of the cheek. When done right, this leaves room for the rudder to rotate, and the gap between the two centerpieces accommodates the line that will operate the rudder.

The manual says that I should:

What's wrong with this picture? Anyone? Bueller?

When you epoxy two surfaces together, and clamp them, the pieces slide around. It doesn't matter if you have them lined up perfectly, applying the clamps is going to perturb things so that they are no longer lined up. It takes some pushing and hammering to get things lined up perfectly once the clamps are on. And of course, it's far worse with three surfaces: Cheek, centerpiece, cheek, with two layers of epoxy. Even worse, in this case, the centerpieces are smaller than the cheeks. So when adjusting these pieces to line up at the edges, it's possible they will slip away from the edge, moving into the interior of the cheeks. And then how do you pull the pieces back out?

I realized that I don't have to do it all at once. So today I just epoxied and clamped the centerpieces to one cheek. Without the second cheek in place, adjustment of the clamped centerpieces is much easier, and removing the squeezed out epoxy is far simpler. I'll let that set for a day, and attach the remaining cheek next.

It's August 20, 2023. I attached the top cheek today. Yes, in fact, I did remember to run the line between the two centerpieces before sealing everything up forever. I used that to clean out squeezed out epoxy in the channel between the centerpieces. I also used a rag wrapped around a paint stirrer to clean out the rest of the area between the cheeks. And it all seemed to go well. There was a bit of squeezed out epoxy on the outside, and very little on the inside. So this definitely has an air of being a bit too perfect. The real test will come later, once today's epoxy has set: Is the channel between the centerpieces actually clear? And will the rudder actually rotate freely when put in its place? A cliffhanger!

Nope, didn't happen

It is August 30, 2023, and our summer here ends tomorrow. I'll drive Hannah to the airport (she will spend a few days in Scotland with Julia), and keep Eloise with us in Somerville for a week. And Audrey and I start school next week!

Just three months ago, I thought that I would finish up the hull, assemble and attach a few parts, slap on some paint and varnish, and then be sailing in July, when Julia visited. It did not work out that way. There was the mast step fiasco. The rudder assembly took a lot of time. The spars still need some work. And I'm realizing that finishing the boat (paint and varnish) is going to be very time consuming. There will be a lot of sanding to get the epoxy surfaces smooth. There will be many coats of paint and varnish, with sanding in between. There is a new procedure I'll need to learn, wet sanding. But next year, for sure.

OK, next summer for sure

September 22, 2023. It's fall, Hannah is back in New York, with Eloise, Julia is in Bristol, Audrey and I are in school! (MA in graphic design for her, another MS in computer science for me. My PhD is from the previous millennium and has expired.)

There are four things left to do on the boat:

  1. Finish the rudder and attach it to the hull.
  2. Finish the spars.
  3. Attach a bunch of pieces of rope and bits of metal necessary to actually make the boat work.
  4. Paint and varnish the boat.

Today I started on #1, sanding down the assembled rudder case. It has lots of excess epoxy all over.


So lots of sanding today. Then it has to be painted and varnished too.

Items #2 and #3 are still hazy to me. The manual seems confusing and incomplete, so I imagine I will have a lot of discussions with CLC support, and the experts on the CLC forums, before I really understand what to do. And #4 is daunting. Still a lot to learn, undoubtedly a lot of sanding, painting and varnishing. I was hoping to avoid another pair of boat moves, between my two work areas. Maybe I'll leave the boat where it is (in the colder, larger work area, the lower garage), and just plan on painting/varnishing in the spring.